 World of Warcraft Guides, Lore, Addons & News – Noob to Boss From Azeroth's Newbie to Champion – World of Warcraft Guides
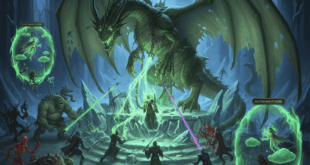
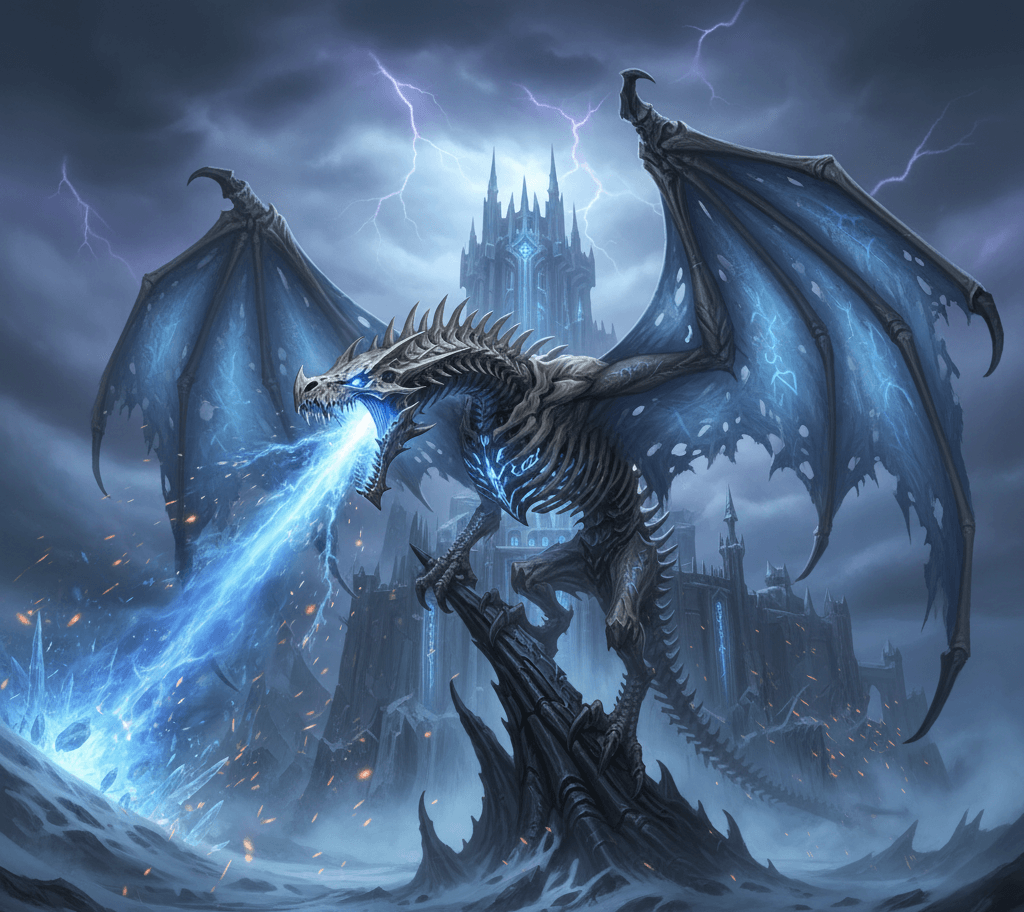
Welcome to this comprehensive Sindragosa Guide, covering strategy tips for defeating this challenging boss in Icecrown Citadel during Wrath of the Lich King Classic. Whether you’re searching for Sindragosa strategy details, her abilities, location, human form lore, mount information, skip methods, or gear drops and loot tables, this article has you covered. Sindragosa serves as the penultimate boss before The Lich King, testing your raid’s coordination with frost-based mechanics and execution-heavy phases.
This encounter emphasizes precise positioning, debuff management, and raid-wide awareness. Below, we’ll break down everything you need to know to conquer her.
Sindragosa Location and Access
Sindragosa is located in the Frostwing Halls wing of Icecrown Citadel, the final raid in WotLK Classic. To reach her, your raid must clear the preceding bosses in the wing, including Valithria Dreamwalker. The citadel itself is situated in Icecrown zone in Northrend, accessible via a portal in Dalaran or by flying directly. Once inside, navigate to the upper spire and enter the Frostwing Halls after defeating the lower bosses.
Abilities Breakdown
Sindragosa boasts a toolkit of frost and arcane abilities that demand careful management. Here’s a breakdown:
| Ability | Description |
|---|---|
| Cleave | Deals physical damage to the tank and nearby allies in a frontal cone. Position melee on flanks to avoid. |
| Tail Smash | Knocks back and damages players behind her. Stay clear of the tail area. |
| Frost Aura | Inflicts 4,500-6,000 Frost damage raid-wide every 3 seconds (higher on Heroic). Frost Resistance gear and auras are essential. |
| Frost Breath | Massive Frost damage cone on the tank, slowing attack and movement speed. Stacks; mitigate with cooldowns and resistance. |
| Permeating Chill | Physical attacks have a 20% chance to apply Chilled to the Bone (1,000 Frost damage per stack every 2 seconds). Pause attacks at 5-8 stacks to reset. |
| Unchained Magic | Afflicts casters/healers; spells build Instability stacks that explode for Arcane damage after 5 seconds. Limit to 3-5 stacks; spread on Heroic to avoid AoE. |
| Icy Grip | Pulls the raid under her, followed by Blistering Cold (lethal Frost damage within 25 yards). Run out immediately. |
| Blistering Cold | Follows Icy Grip; deals massive damage close to her. Use floor markers for safe distance. |
| Frost Beacon | Marks players for Ice Tomb after 7 seconds. Tombs deal splash damage and freeze extras if too close. |
| Ice Tomb | Freezes marked players; provides LoS for Frost Bombs but must be broken after. Causes Asphyxiation if left too long (8% HP loss per second). |
| Frost Bomb | Dropped during air phase; one-shots without LoS from Ice Tombs. Reposition based on blue rings. |
| Mystic Buffet | Phase 2 pulse: Increases magic damage taken by 15-20% per stack (additive). Reset by hiding behind Ice Tombs. |
Sindragosa Boss Strategy & Phases
Sindragosa is a Level 83 undead boss with varying HP: 11.2M (10N), 13.9M (10H), 38.3M (25N), 46M (25H). The fight features two ground phases separated by air intermissions, focusing on survival over raw DPS.
Phase 1: 100% to 35% HP
- Positioning: Tank her in the room’s center. Melee on flanks to dodge Cleave and Tail Smash. Ranged/healers stack centrally but spread for Unchained Magic.
- Debuff Management: Melees watch Chilled to the Bone—stop attacking at 5-8 stacks. Casters/healers limit Instability to 3-5 stacks during Unchained Magic.
- Frost Breath: Tank uses Frost Resistance (aim for 255+) and cooldowns. Healers prep for bursts.
- Icy Grip & Blistering Cold: After pull-in, sprint 25+ yards away (use the inner circle edge as a guide).
- Transition: At ~50 seconds and every minute, she lifts off, marking 5-6 players with Frost Beacon.
Air Phase (Intermission)
- Frost Beacon Handling: Marked players stack in pairs near stairs (10+ yards apart to avoid chain tombs). Raid moves up stairs to evade splash.
- Ice Tombs: Pre-heal marked players with HoTs and shields. DPS tombs slowly to 20% HP, then break after all 4 Frost Bombs.
- Frost Bombs: Hide behind tombs for LoS; watch blue rings and adjust.
- Duration: 45 seconds; she lands and resumes Phase 1 until 35% HP.
Phase 2: 35% to 0% HP
- New Mechanic: Mystic Buffet pulses every 6 seconds, amplifying magic damage.
- Ice Tombs: Now single-target every 15 seconds. Place on outer circle, alternating sides. Use to reset Mystic Buffet at 3 stacks.
- Debuff Synergy: Higher Mystic Buffet makes Frost Aura, Chilled to the Bone, and Instability deadlier. Plan resets carefully.
- Tank Strategy: Swap tanks every 1-3 Frost Breaths (use cooldowns like Shield Wall or Pain Suppression). High Frost Resistance (500+) allows longer tanking.
- Heroism/Bloodlust: Pop here for burst DPS to shorten the phase.
- Healer Strain: With constant Unchained Magic, run 5-8 healers for coverage.
No enrage timer, but prolonged Phase 2 risks wipes from stacking debuffs.
Recommended Raid Composition
- Tanks: 2 (for Phase 2 swaps; 1 possible with high resistance and fast DPS).
- Healers: 5-8 (to counter Unchained Magic downtime).
- DPS: 15-19 (low DPS check; prioritize survival).
- Buffs: Include Frost Resistance Aura; stack healers for consistency.
Tips and Tricks by Role
🛡️Tanks
- Start mounted for quick positioning.
- Cycle cooldowns for Frost Breath, ensuring availability in Phase 2.
- Communicate swaps; use externals like Hand of Sacrifice.
⚔️Melee DPS
- Flank position to avoid front/back attacks.
- Reset Chilled to the Bone at safe stacks; Phase 2 hides also clear it.
- Save cooldowns for Phase 2 burst.
⚔️Ranged DPS
- Stack centrally; spread for Unchained Magic (tail side on Heroic).
- Wand if needed to avoid Instability, but watch Chilled to the Bone.
- Reset Mystic Buffet at 3 stacks without exploding Instability near others.
💉Healers
- Spread head-side for Unchained Magic.
- Pre-HoT Frost Beacon targets; use Hand of Freedom on tanks pre-air phase.
- Rotate cooldowns for Phase 2 Frost Breaths; position for LoS to tank while resetting buffs.
Sindragosa Gear Drops and Loot Table
Sindragosa drops high-ilvl gear (251-284 depending on mode), including Tier 10 tokens (Marks of Sanctification). Below are organized loot tables by difficulty.
10-Player Normal & Heroic
| Slot | Item Name | Item Type |
|---|---|---|
| Neck | Rimetooth Pendant | Accessories |
| Chest | Robes of Azure Downfall | Cloth Armor |
| Hands | Icicle Shapers | Leather Armor |
| Wrist | Vambraces of the Frost Wyrm Queen | Leather Armor |
| Shoulder | Shoulderguards of Crystalline Bone | Mail Armor |
| Feet | Wyrmwing Treads | Mail Armor |
| Waist | Etched Dragonbone Girdle | Plate Armor |
| Legs | Legplates of Aetheric Strife | Plate Armor |
| Feet | Scourge Fanged Stompers | Plate Armor |
| Shield | Lost Pavise of the Blue Flight | Shield |
| Dagger | Bleak Coldarra Carver | Weapon: Main Hand |
| Fist Weapon | Splintershard | Weapon: Off Hand |
25-Player Normal & Heroic
| Slot | Item Name | Item Type |
|---|---|---|
| Ring | Memory of Malygos | Accessories |
| Neck | Sindragosa’s Cruel Claw | Accessories |
| Trinket | Phylactery of the Nameless Lich | Trinket |
| Trinket | Sindragosa’s Flawless Fang | Trinket |
| Off-hand | Sundial of Eternal Dusk | Weapon: Off Hand |
Reins of the Icebound Frostbrood Vanquisher – Sindragosa Mount
Sindragosa herself doesn’t drop a mount directly, but defeating her is key to unlocking frost wyrm mounts through achievements. The Reins of the Icebound Frostbrood Vanquisher is awarded for completing the Glory of the Icecrown Raider (25-player) achievement, which includes tasks like the “All You Can Eat” meta on Sindragosa (no raid member exceeding 5 stacks of Mystic Buffet). This epic flying mount resembles an undead frost dragon, tying into Sindragosa’s theme. In lore, Arthas occasionally rides Sindragosa as a mount, but players can’t obtain her specifically—focus on heroic raid achievements for similar rewards.
All You Can Eat (10 player)(25player) – Sindragosa Achievement
- All You Can Eat (10/25): Defeat Sindragosa without any raid member reaching more than 5 Mystic Buffet stacks. Use Ice Tombs diligently for resets—key for the meta-achievement and mount unlock.
For full ICC achievement details, see the Icecrown Citadel achievements guide.
Sindragosa Skip Method
For players farming Icecrown Citadel (e.g., for The Lich King’s Invincible mount), skipping the trash mobs before Sindragosa can speed up runs. Common methods include class-specific exploits like Demon Hunter gliding through walls or using toys for any class to bypass the gauntlet after Blood-Queen Lana’thel. For example, position near the edge after Lana’thel, use a glider or movement ability to drop down to Sindragosa’s level, avoiding the spider trash and frost wyrms. This skip works in both 10- and 25-player modes but requires practice to avoid aggro. Always check current patches, as Blizzard occasionally fixes these.
Sindragosa FAQ – Icecrown Citadel WotLK Classic
This FAQ answers common questions about the Sindragosa Guide in Icecrown Citadel, covering strategy, lore, rewards, and mechanics for both Normal and Heroic difficulties. Whether you’re tackling her for the first time or farming for loot, these answers will help you succeed.
Where is Sindragosa located in Icecrown Citadel?
Sindragosa resides in the Frostwing Halls wing of Icecrown Citadel, located in the Icecrown zone of Northrend. Access the raid via the Dalaran portal or by flying to the citadel. Clear the lower bosses and Valithria Dreamwalker in Frostwing Halls to reach her in the upper spire.
What is Sindragosa’s human form in lore?
In her draconic life, Sindragosa was the prime consort of Malygos, the Blue Dragonflight Aspect. She has no humanoid form in the WotLK encounter, appearing only as an undead frost wyrm. However, in later expansions like Dragonflight, a simulacrum of Sindragosa appears as a high elf-like figure, reflecting her pre-death visage. Her tragic story involves her death during the War of the Ancients and resurrection by the Lich King.
Is there a Sindragosa mount, and how do I get it?
Sindragosa herself isn’t a mount, but defeating her contributes to earning the Icebound Frostbrood Vanquisher, a frost wyrm mount. This is rewarded for completing the Glory of the Icecrown Raider achievement (10- or 25-player), which includes the “All You Can Eat” meta (no raid member exceeding 5 stacks of Mystic Buffet). Focus on mastering her mechanics to unlock this reward.
How can I skip trash to Sindragosa?
To skip trash mobs before Sindragosa (e.g., for Invincible farming), use class abilities or toys to bypass the gauntlet after Blood-Queen Lana’thel. A common method involves positioning near the edge post-Lana’thel and using movement abilities (e.g., Demon Hunter glide, engineering gliders, or toys) to drop to Sindragosa’s platform, avoiding spider and frost wyrm trash. Practice is key, and Blizzard may patch exploits, so check current game updates.