 World of Warcraft Guides, Lore, Addons & News – Noob to Boss From Azeroth's Newbie to Champion – World of Warcraft Guides
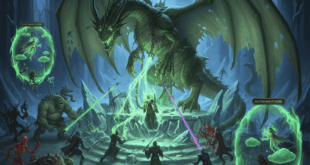
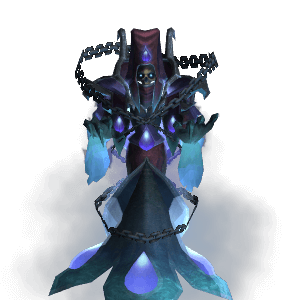
https://noobtoboss.com/the-lich-king-guide-icc-raid-wotlk-classic/Lady Deathwhisper is the second boss of Icecrown Citadel, a powerful lich who serves as the High Priestess of the Cult of the Damned. Her encounter is a two-phase fight that tests a raid’s ability to manage adds, interrupt key spells, and handle a threat-reducing mechanic. This Lady Deathwhisper guide covers her abilities, detailed Lady Deathwhisper strategy for both phases, role-specific tips, and complete loot tables for 10- and 25-player modes in WotLK Classic..
Quick Strategy Summary
- Phase 1: Deplete her Mana Barrier while managing waves of adds
- Tank Cult Fanatics away from raid – they have deadly cleaves
- Interrupt Cult Adherents constantly – assign dedicated interrupters
- Phase 2: Tank swap at 3 stacks of Touch of Insignificance
- Burn phase: All DPS on Lady Deathwhisper – she takes 300% increased damage
- Location: Lower Spire, Icecrown Citadel (Northrend)
- Difficulty Levels: 10-player Normal/Heroic, 25-player Normal/Heroic
- Health Values: 3.3M (10N) / 6.7M (10H) / 13.4M (25N) / 26.8M (25H)
- Enrage Timer: 10 minutes
- Key Challenge: Efficiently killing waves of adds while damaging her Mana Barrier in Phase 1, followed by a tank swap on her threat-reducing debuff in Phase 2.
Related ICC Boss Guides
Complete your Icecrown Citadel mastery:
- Lord Marrowgar Guide – Previous ICC boss strategy
- Gunship Battle Guide – Next ICC boss strategy
- Icecrown Citadel Guide – Complete ICC strategy
Lady Deathwhisper Abilities Breakdown
The fight is divided into two phases, with different abilities and a different primary target in each. Here’s a breakdown of what you’ll face in this ICC second boss encounter.
Phase 1: The Mana Barrier
In this phase, Lady Deathwhisper is protected by a Mana Barrier that absorbs all incoming damage to her health and instead drains her mana. When her mana reaches zero, Phase 2 begins. She also summons waves of adds to attack the raid.
| Ability | Description | Notes |
|---|---|---|
| Mana Barrier | Absorbs all damage dealt to Lady Deathwhisper, draining her mana instead of health. | This is the raid’s primary target. Her mana equals her health pool. |
| Shadow Bolt | Cast spell dealing 11,375-14,625 Shadow damage to a random raid member every ~2 seconds. | Uninterruptible in Phase 1. Continuous spam throughout the phase. |
| Death and Decay | Creates a green area dealing 6,000 Shadow damage per second for 10 seconds in 8-yard radius. | Cast every 30 seconds after initial 12 seconds. Move out immediately. |
| Dominate Mind | Mind controls 3 random players (except tanks) for 12 seconds, increasing damage by 200% and healing by 500%. | Occurs every 40 seconds. Use Cyclone or CC to protect controlled players. Not in 10N. |
| Summon Adds | Spawns 7 cultists every 45 seconds: 3 Cult Fanatics + 4 Cult Adherents from sides and stairs. | One add per wave gets Dark Transformation/Empowerment. Position to funnel adds to tanks. |
| Reanimated Adds | Dead cultists can explode with Dark Martyrdom, then resurrect as immune versions. | Reanimated Adherents immune to magic, Reanimated Fanatics immune to physical damage. |
Phase 2: Final Stand
Once Lady Deathwhisper’s Mana Barrier is depleted, she becomes vulnerable. She also gains a new ability that requires a tank swap and continues to cast her old spells with greater frequency. Adds also continue to spawn on Heroic difficulty.
| Ability | Description | Notes |
|---|---|---|
| Frostbolt | Replaces Shadow Bolt. Deals 58,500-61,500 Frost damage to tank and slows by 50% for 4 seconds. | MUST be interrupted constantly. Much more dangerous than Phase 1 Shadow Bolt. |
| Frostbolt Volley | Instant cast every 20 seconds. Deals 14,400-17,600 Frost damage to entire raid and slows by 30%. | Raid-wide damage spike. Healers prepare for follow-up mechanics after each volley. |
| Touch of Insignificance | Applied every ~8 seconds, reduces tank’s threat generation by 20% per stack for 30 seconds. | Normal: Can taunt at 3 stacks. Heroic: No taunting – requires natural threat management. |
| Summon Spirit | Every ~10 seconds, spawns 3 Vengeful Shades that chase random players for 5 seconds. | If shades reach target, they explode for 20k+ damage in 20-yard radius. Must kite away. |
| Continued Mechanics | Death and Decay and Dominate Mind continue at same frequency as Phase 1. | Stay spread for D&D, stop AoE for mind control. Use mobility for shade kiting. |
Lady Deathwhisper Strategy and Fight Phases
The encounter is a two-phase fight. The transition from Phase 1 to Phase 2 is controlled by your raid’s DPS on the Mana Barrier.
Phase 1: Add Control and Mana Drain
- Positioning: The raid should stack in the center of the room. Tanks should position the adds on either side, facing them away from the raid to avoid cleaves.
- Add Management:
- Cult Fanatics must be tanked and focused down by spell DPS. They have a powerful cleave and cast Necrotic Strike, which absorbs healing.
- Cult Adherents should be interrupted at all times to prevent casting. They must be focused down by physical DPS.
- When adds die and are Reanimated, adjust your focus accordingly (physical vs. magical immunity).
- Mana Barrier: The raid’s main goal is to deplete Lady Deathwhisper’s mana. While DPS on adds is important for survival, the bulk of your damage should be going to the Mana Barrier.
- Mind Control: If Dominate Mind is cast (on 25-player or Heroic), immediately use crowd control on the affected player.
Phase 2: The Tank Swap and Burn
- Transition: When the Mana Barrier is broken, Lady Deathwhisper’s health is exposed, and she gains Touch of Insignificance. Her Shadow Bolt spam is replaced with interruptible Frostbolt casts dealing 45k-60k damage that must be interrupted.
- Tanking Strategy: Touch of Insignificance is applied every ~8 seconds. In Normal mode, simply taunt at 3 stacks. In Heroic mode, she cannot be taunted – both tanks must build threat naturally and swap based on debuff timing.
- New Abilities: Lady Deathwhisper gains Frostbolt Volley (raid-wide damage every 20 seconds) and spawns Vengeful Shades every ~10 seconds that must be kited away from the raid.
- DPS Focus: All DPS should focus on Lady Deathwhisper. Contrary to some guides, she does NOT take increased damage in Phase 2 – this was likely confusion with other bosses.
- Heroic Differences: Cultists continue spawning (3 per wave, alternating sides), and all mechanics hit harder.
Role-Specific Tips
Tank Tips
- Phase 1: Your primary job is to pick up adds and keep them facing away from the raid. Be ready to pick up the reanimated versions as they spawn.
- Phase 2: This is a classic tank swap fight. Communicate with your co-tank to swap at 3 stacks of Touch of Insignificance to avoid losing threat. Remember, she cannot be taunted in this phase.
DPS Tips
- Interrupts: Interrupting Shadow Bolts and other key casts from the adds is crucial for survival, especially in Phase 1.
- Add Priority: Know your target. Melee DPS should focus on Adherents and Reanimated Fanatics. Ranged and spell DPS should focus on Fanatics and Reanimated Adherents.
- Cooldowns: Save major cooldowns for Phase 2, where Lady Deathwhisper takes 300% increased damage. This is your chance to burn her down quickly.
Healer Tips
- Phase 1: Be prepared for spiky damage from adds. Have healing cooldowns ready for the transition to Phase 2.
- Phase 2: Healing becomes more about raid-wide damage from Death and Decay and Vengeful Shades as well as the constant tank damage. Keep an eye on your tanks for the Touch of Insignificance debuff and be ready for a threat-related spike.
Normal vs. Heroic: Key Differences
| Aspect | Normal | Heroic |
|---|---|---|
| Health & Mana | 3.3M (10p) / 13.4M (25p) | 6.7M (10p) / 26.8M (25p) |
| Add Spawns | Stop in Phase 2 | Continue in Phase 2 |
| Add Abilities | Adds die when her Mana Barrier is broken | Adherents will resurrect a dead Fanatic, and vice versa. |
| Dominate Mind | 25-player only | 10-player and 25-player |
| Vengeful Shades | Present in Phase 2 | Appear more frequently and hit harder |
Loot Tables: What Drops from Lady Deathwhisper?
Defeating Lady Deathwhisper will reward players with a variety of gear and Tier 10 tokens to upgrade their armor sets. The Heroic versions drop the same items with higher item levels.
🟦 10-Player Loot
| Slot | Item | Type |
|---|---|---|
| Wrist | Bracers of Dark Blessings | Cloth Armor |
| Hands | Sister’s Handshrouds | Cloth Armor |
| Feet | Boots of the Frozen Seed | Leather Armor |
| Chest | Chestguard of the Frigid Noose | Leather Armor |
| Waist | Soulthief’s Braided Belt | Leather Armor |
| Waist | Deathspeaker Disciple’s Belt | Mail Armor |
| Hands | Handgrips of Frost and Sleet | Mail Armor |
| Head | Deathspeaker Zealot’s Helm | Plate Armor |
| Chest | Ghoul Commander’s Cuirass | Plate Armor |
| Trinket | Whispering Fanged Skull | Trinket |
| Off-hand | Scourgelord’s Baton | Weapon: Off Hand |
| Bow | Njorndar Bone Bow | Weapon: Ranged |
🟥 25-Player Loot
| Slot | Item | Type |
|---|---|---|
| Neck | Ahn’kahar Onyx Neckguard | Accessories |
| Ring | Juggernaut Band | Accessories |
| Ring | Ring of Maddening Whispers | Accessories |
| Shoulder | Shoulders of Mercy Killing | Cloth Armor |
| Wrist | The Lady’s Brittle Bracers | Cloth Armor |
| Shoulder | Cultist’s Bloodsoaked Spaulders | Leather Armor |
| Chest | Deathwhisper Raiment | Leather Armor |
| Legs | Leggings of Northern Lights | Mail Armor |
| Feet | Necrophotic Greaves | Mail Armor |
| Feet | Blood-Soaked Saronite Stompers | Plate Armor |
| Head | Broken Ram Skull Helm | Plate Armor |
| Hands | Fallen Lord’s Handguards | Plate Armor |
| Dagger | Heartpierce | Weapon: One-Hand |
| Bow | Zod’s Repeating Longbow | Weapon: Ranged |
| Staff | Nibelung | Weapon: Two-Hand |
Full House Achievement Guide
The main achievement for this encounter is Full House, which can be challenging to coordinate in this ICC second boss guide.
“Full House” Strategy
- Requirement: Defeat Lady Deathwhisper with at least five different types of Cultists active at the time of her demise. The five types are: Cult Adherent, Cult Fanatic, Deformed Fanatic, Reanimated Adherent, and Reanimated Fanatic.
- Strategy: This requires a very specific approach. Your raid must have enough DPS to push the Mana Barrier down, but not so much that you kill all the adds. The safest way is to clear the adds initially, then manage their spawns. Let the different types spawn and transform, and then hold DPS on her Mana Barrier until you have all five types of adds active. Once confirmed, burn the Mana Barrier to transition to Phase 2 and finish her off before the adds become unmanageable.
- Tips for Success: Assign specific players to monitor add types, use voice communication to coordinate, and practice the timing on Normal mode before attempting on Heroic difficulty.
For more detailed strategies on ICC bosses, check out the Icecrown Citadel achievements guide.
Frequently Asked Questions
Q: How many phases does Lady Deathwhisper have?
Q: What is the Full House achievement WotLK?
Q: When do you tank swap on Lady Deathwhisper?
Q: What makes Lady Deathwhisper heroic harder?
Q: How long does the Lady Deathwhisper fight take?
Final Thoughts: A Test of Discipline
Lady Deathwhisper is an exercise in raid discipline and target management. Phase 1 tests your ability to balance add control with steady Mana Barrier damage, while Phase 2 requires precise tank coordination for the burn phase. Master this Lady Deathwhisper strategy, and your raid will progress smoothly through the Lower Spire of Icecrown Citadel toward the upper wings.
This comprehensive Lady Deathwhisper guide should prepare your raid for both Normal and Heroic encounters. With proper execution of add management and tank swaps, you’ll claim her loot and move one step closer to facing the Lich King himself.