Valithria Dreamwalker Raid Composition
Standard 25-Man Setup
- 🛡️Tanks : 1 tank (for Gluttonous Abominations Only)
- 💉Healers: 5-10 healers (optimal: 7-8)
- ⚔️DPS: 14-19 players for add control and interrupts
Standard 10-Man Setup
- 🛡️Tanks: 1 tank
- 💉Healers: 3-5 healers
- ⚔️DPS: 4-6 players
Why More Healers Work Better
Unlike typical encounters, additional healers directly contribute to faster completion since the win condition is healing output rather than damage. Players with dual specialization should consider switching to healing roles for this fight.
Valithria Dreamwalker Enemy Types , Adds & Kill Priority
Waves of undead enemies spawn from four doors around Valithria’s chamber approximately every 10 seconds, with spawn rates increasing as the fight progresses. Most enemies have low threat and can be attacked freely by DPS without waiting for tank pickup.
Kill Priority Order
1. Blazing Skeleton (350,000 HP) – HIGHEST PRIORITY
Threat Level: Critical
Abilities:

- Lay Waste: Deals approximately 6,000 fire damage every 2 seconds to the entire raid AND Valithria until killed (totaling ~100,000 raid damage per skeleton)
- Fireball: Single-target fire damage (~6,000) with 2-second cast
Strategy: Kill immediately upon spawn. One Blazing Skeleton spawns roughly every 60 seconds, making them predictable and easy to prioritize.
Why First: Each tick of Lay Waste forces healers to heal the raid instead of Valithria, significantly slowing encounter progress.
2. Suppresser (151,000 HP)
Threat Level: High
Abilities:
- Suppression: Channels on Valithria, reducing healing received by 10% per active Suppresser (stacks)
- No threat table, no attacks
Strategy: Suppressers spawn in pairs from each gate and rush directly to Valithria. Use crowd control and focus fire to eliminate them before they reach the dragon and begin channeling. Every Suppresser that reaches Valithria reduces your healing throughput by 10%.
Why Second: Multiple Suppressers channeling simultaneously can reduce healing by 30-50%, drastically extending fight duration.
3. Risen Archmage (390,000 HP)
Threat Level: Moderate-High

Abilities:
- Frostbolt Volley: 2-second cast dealing 4,000 frost damage (5,000 heroic) to all players within 60 yards + 50% movement speed reduction for 8 seconds
- Mana Void: Ground effect draining 1,250 mana per second from players within 6 yards, lasts 30 seconds
- Column of Frost: Ground effect that erupts after 2 seconds, dealing 16,500 frost damage (18,500 heroic) + knockback + fall damage
Strategy: Interrupt Frostbolt Volley whenever possible. Watch for ground effects and move away immediately. Mana drains can starve healers while Column of Frost can one-shot players with the combined burst and fall damage.
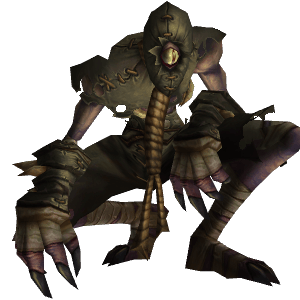
4. Blistering Zombie (302,000 HP)
Threat Level: Moderate (High if aggro’d)
Abilities:

- Corrosion: Each melee hit applies a stacking debuff dealing 6,250 nature damage over 6 seconds and reducing armor by 10% (stacks 5 times)
- 5 stacks = 50% armor reduction + 15,600 nature damage every 3 seconds
- Acid Burst: Upon death, explodes dealing 16,000 nature damage (18,500 heroic) to all players within 15 yards + 20-second DoT dealing 1,000 nature damage per second (1,250 heroic) = 20,000-25,000 total damage
Strategy: KITE, DO NOT FACETANK. Use Chains of Ice and ranged attacks. Melee DPS should be extremely careful with threat. When a Blistering Zombie reaches low health, all nearby players must move away before it dies to avoid the explosion.
Danger: Can one-shot cloth wearers if allowed to melee. The death explosion can wipe stacked groups.
5. Gluttonous Abomination (1,300,000 HP) – LOWEST PRIORITY
Threat Level: Low
Abilities:
- Heavy physical melee damage (~45,000 before mitigation, ~10,000 to tanks)
- Gut Spray: Frontal cone attack applying disease that increases damage taken by 25% for 12 seconds + nature DoT
- Spawns Rot Worms upon death (minor AoE threat)
Strategy: Tank picks up and faces away from raid. Cleanse Gut Spray disease immediately. Only one Gluttonous Abomination spawns approximately every 60 seconds. Kill last since they pose minimal raid threat when properly tanked.
How to Heal Valithria Dreamwalker: Portal Mechanics & Emerald Vigor
Portal Timeline
Every 45 seconds in combat, Valithria Dreamwalker summons green Nightmare Portals at random locations around her chamber. Understanding the portal cycle is crucial for maximizing healing output.
Cycle Breakdown:
- Portals Spawn (0:00) – Portals appear around the room
- Setup Phase (0:00-0:15) – 15 seconds to position near portals
- Portals Open (0:15) – Up to 8 players can enter (25-man)
- Dream State (0:15-0:35) – 20 seconds inside Emerald Dream
- Return (0:35) – Players exit and resume healing
- Repeat (0:45) – Next portal cycle begins
Inside the Emerald Dream
Upon entering a portal, players receive the Dream State buff (20-second duration) allowing free flight. The Emerald Dream contains floating green Nightmare Clouds that grant powerful buffs when touched.
Emerald Vigor Buff:
- Duration: 40 seconds
- Maximum Stacks: 100
- Per Stack Bonus:
- +10% damage and healing done
- +200 mana regeneration every 3 seconds
- Stack Limit: At 100 stacks = +1000% healing/damage and massive mana regeneration
Optimal Portal Strategy
Entry Phase (First 2 seconds):
- Immediately fly to and pop the nearest Nightmare Cloud
- This refreshes your existing Emerald Vigor stacks (which have ~5 seconds remaining from the previous portal)
Collection Phase (Remaining 18 seconds):
- All healers fly together toward a pre-designated meeting point
- Pop clouds simultaneously so everyone gains stacks together
- This coordination maximizes stacks since cloud spawns are limited
Exit Phase (Final 3 seconds):
- Fly low to the ground before Dream State expires
- Prevents fall damage when forcibly ejected
- Be ready to immediately heal Valithria upon return
Pro Tip: Assign one healer as the “cloud leader.” All other healers follow this player’s flight path to ensure perfect cloud coordination.
Valithria Dreamwalker Healing Strategy Guide
Healer Assignments
Portal Team (3-8 healers):
- Enter every Nightmare Portal
- Focus on stacking Emerald Vigor
- Pump maximum healing into Valithria between portal phases
Raid Healers (1-2 healers):
- Never enter portals
- Maintain raid health throughout encounter
- Cover healing during portal transitions
Healing Phases
Phase 1: Ramp-Up (0-50% Progress) [50-65% Dragon HP]
- Focus on building Emerald Vigor stacks
- Enter every portal available
- Maintain steady healing on Valithria
- Goal: Reach 20-30 stacks of Emerald Vigor per healer
Phase 2: Stabilization (50-80% Progress) [65-80% Dragon HP]
- Continue entering portals
- Build toward 40-60 stacks
- Save major healing cooldowns
- Coordinate cooldown usage with portal exits
Phase 3: Burn Phase (80-100% Progress) [80-100% Dragon HP]
- CRITICAL: Wait for the Dream State phase to complete
- Upon exiting final portal, use ALL cooldowns simultaneously:
- Heroism/Bloodlust
- Guardian Spirit (Holy Priest) – +40% healing received on Valithria
- Divine Favor (Holy Paladin)
- Avenging Wrath (Holy Paladin)
- Nature’s Swiftness (Restoration Druid/Shaman)
- Inner Focus (Priest)
- All class-specific healing cooldowns
Why Wait for Portal Exit: Your Emerald Vigor stacks will be at maximum (60-100 stacks), multiplying all healing cooldowns exponentially. A coordinated burn with Heroism at 60+ stacks can heal 5-8 million HP in 20-30 seconds.
Best Healing Classes for Valithria
S-Tier:
- Holy Paladin: Beacon of Light synergy, Glyph of Holy Light splash healing, strong burst healing
- Restoration Druid: HoT effects scale multiplicatively with Emerald Vigor stacks
A-Tier:
- Holy Priest: Guardian Spirit buff, Circle of Healing, Prayer of Healing
- Discipline Priest: Power Word: Shield spam, Penance, Grace stacks
- Restoration Shaman: Chain Heal becomes incredibly powerful with high stacks
Healing Rotation with Emerald Vigor
0-20 Stacks: Use efficient healing spells 20-40 Stacks: Begin using faster casts, less mana efficiency concern 40+ Stacks: Spam your fastest heals regardless of mana cost
Valithria Dreamwalker Heroic Difficulty Guide
Heroic mode transforms the encounter from a pure healing challenge into a survival healing challenge by adding significant self-damage to the portal mechanic.
Key Differences
Twisted Nightmares Replaces Emerald Vigor:
Red portals spawn instead of green, granting Twisted Nightmares debuff:
Benefits (Same as Emerald Vigor):
- +10% damage and healing per stack
- +200 mana regeneration per 3 seconds per stack
- 40-second duration
- Stacks to 100
Penalty (NEW):
- 200 nature damage per second per stack
- At 20 stacks: 4,000 nature damage per second
- At 30 stacks: 6,000 nature damage per second
- At 50 stacks: 10,000 nature damage per second
- At 100 stacks: 20,000 nature damage per second (instant death)
Heroic Strategy Adjustments
Healer Self-Sustain Required: Healers must now heal themselves and each other while maintaining Valithria healing output. This dual requirement makes heroic significantly harder.
Optimal Heroic Composition:
- Holy Paladins become MVP: Beacon of Light allows simultaneous healing of Valithria while healing stacked healers with Glyph of Holy Light splash
- Stack Holy Paladins if possible (3-4 in 25-man)
Heroic Portal Strategy:
- Healers should use instant-cast heals and HoTs on themselves while flying
- Enter portals together and exit together for coordinated healing
- Stack together after portal exits for splash healing efficiency
- Consider limiting stacks to 30-40 maximum for safety
- Use defensive cooldowns before entering portals
Burn Phase Timing: Execute burn at 75-80% instead of 80-85% to allow for the self-damage healing requirement. You’ll need slightly lower stacks but better survival.
How to Solo Valithria Dreamwalker (Class-Specific Guide)
Soloing Valithria Dreamwalker requires 18 million healing output without raid support. Only classes with healing specializations can realistically complete this encounter solo.
Classes That Can Solo Valithria
✅ Viable (Realistic Solo Capability)
1. Holy Paladin (EASIEST)
Difficulty: Easy
Expected Time: 15-25 minutes
Success Rate: Very High
Strategy:
- Spec full Holy with healing talents
- Stack Intellect and Spell Power gear
- Enter every Nightmare Portal (goal: 40-60 Emerald Vigor stacks)
- Kill priority: Blazing Skeleton → Suppresser → others
- Use Flash of Light as primary heal (faster cast)
- Holy Light for efficiency during low-threat moments
- Save Lay on Hands for emergency or final burn
- Use Divine Favor + Avenging Wrath for burst phases
Why Holy Paladin Excels:
- Beacon of Light allows healing while handling adds
- Plate armor provides survivability
- Holy Shock instant heal for movement
- Strong mana regeneration with Illumination
- Multiple healing cooldowns
Gear Priority: Intellect > Spell Power > Haste > Crit > Spirit
2. Holy Priest
Difficulty: Moderate
Expected Time: 20-30 minutes
Success Rate: High
Strategy:
- Full Holy specialization
- Focus on building Emerald Vigor stacks (target: 30-50)
- Use Guardian Spirit on Valithria during burn phases (+40% healing received)
- Circle of Healing and Prayer of Healing for quick burst
- Flash Heal spam at high Emerald Vigor stacks
- Renew during movement phases
Challenges:
- Lower armor than Paladin (more vulnerable to adds)
- Must carefully manage add spawns while healing
3. Restoration Druid
Difficulty: Moderate
Expected Time: 20-35 minutes
Success Rate: Moderate-High
Strategy:
- Full Restoration spec
- Stack HoTs on Valithria: Rejuvenation, Regrowth, Wild Growth, Lifebloom
- HoTs scale multiplicatively with Emerald Vigor (extremely powerful at high stacks)
- Use Swiftmend on cooldown
- Cat/Bear form for add control when necessary
- Nature’s Swiftness for emergency healing
Why Druids Struggle:
- Slower ramp-up time
- Must hard-cast Nourish/Healing Touch for big heals
- Lower burst healing than Paladins/Priests
4. Restoration Shaman
Difficulty: Moderate-Hard
Expected Time: 25-40 minutes
Success Rate: Moderate
Strategy:
- Full Restoration specialization
- Chain Heal becomes incredibly powerful with Emerald Vigor stacks
- Riptide on cooldown
- Lesser Healing Wave for fast heals
- Healing Wave for efficiency
- Use Earth Shield on self for survivability
Challenges:
- Lowest armor class (vulnerable to adds)
- Chain Heal requires targets (less effective on single target)
- Limited mobility while casting
⚠️ Extremely Difficult (Requires Perfect Execution + Healing Gear)
Hybrid Specs with Healing Capability:
- Retribution Paladin: Must carry full Holy gear set, expect 40-60 minutes
- Shadow Priest: Must carry full Holy gear set, expect 45+ minutes
- Balance Druid: Must carry full Restoration gear set, expect 50+ minutes
- Enhancement Shaman: Must carry full Restoration gear set, expect 60+ minutes
Requirements for Hybrid Solo:
- Complete healing gear set with high Spell Power/Intellect
- Perfect portal execution (cannot miss clouds)
- Flawless add control
- Extensive practice and patience
❌ Not Viable (Cannot Solo)
Pure DPS classes without healing capabilities:
- Warriors (all specs)
- Rogues
- Hunters
- Mages
- Warlocks
- Death Knights
- Feral Druids (no healing spec)
Why Impossible: These classes cannot generate the required 18 million healing. Bandages, consumables, and engineering items provide negligible healing and cannot target Valithria.
Solo Strategy: Add Management
When soloing, add control becomes critical since you lack DPS support.
Priority System:
- Blazing Skeleton: Drop everything, kill immediately (30-45 seconds)
- Suppressers: Kill before they reach Valithria (15-20 seconds each)
- Risen Archmage: Interrupt Frostbolt Volley, avoid ground effects
- Blistering Zombie: Kite with snares, kill from range
- Gluttonous Abomination: Tank and ignore until other adds are dead
Time Management:
- Enter portals every 45 seconds without exception
- Minimize time spent on adds (just enough to survive)
- Every second not healing Valithria extends the encounter
- At 50+ Emerald Vigor stacks, healing becomes exponentially faster
Solo Heroic Mode
Verdict: Extremely difficult, borders on impossible for most classes.
Holy Paladin Only: The self-damage from Twisted Nightmares (200+ nature damage per second per stack) makes solo heroic incredibly punishing. Success requires:
- Perfect add control
- Limiting Twisted Nightmares stacks to 20-30 maximum
- Constant self-healing while healing Valithria
- 45-90 minute attempts
- Near-perfect execution
Not Recommended: Even experienced players should avoid solo heroic attempts unless fully optimized with best-in-slot gear.
Valithria Dreamwalker Loot Tables (All Difficulties)
Valithria Dreamwalker drops item level 264 gear (Normal) and item level 277 gear (Heroic) across all armor types and several weapon categories.
10-Player Normal / Heroic Loot (iLevel 264 , 277)
| Slot | Item Name | Type |
|---|---|---|
| Back | Lich Wrappings | Accessories |
| Legs | Leggings of the Refracted Mind | Cloth Armor |
| Head | Sister Svalna’s Spangenhelm | Leather Armor |
| Shoulder | Skinned Whelp Shoulders | Leather Armor |
| Legs | Legguards of the Twisted Dream | Mail Armor |
| Hands | Stormbringer Gloves | Mail Armor |
| Shoulder | Emerald Saint’s Spaulders | Plate Armor |
| Waist | Ironrope Belt of Ymirjar | Plate Armor |
| Wrist | Taiga Bindings | Plate Armor |
| Gun | Dreamhunter’s Carbine | Weapon: Ranged |
| Mace | Oxheart | Weapon: Two-Hand |
| Staff | Sister Svalna’s Aether Staff | Weapon: Two-Hand |
25-Player Heroic / Normal Loot (iLevel 277)
| Slot | Item Name | Type |
|---|---|---|
| Ring | Devium’s Eternally Cold Ring | Accessories |
| Back | Frostbinder’s Shredded Cape | Accessories |
| Ring | Frostbrood Sapphire Ring | Accessories |
| Neck | Noose of Malachite | Accessories |
| Chest | Robe of the Waking Nightmare | Cloth Armor |
| Wrist | Bracers of Eternal Dreaming | Leather Armor |
| Hands | Anub’ar Stalker’s Gloves | Mail Armor |
| Head | Snowstorm Helm | Mail Armor |
| Feet | Boots of the Funeral March | Plate Armor |
| Waist | Coldwraith Links | Plate Armor |
| Feet | Grinning Skull Greatboots | Plate Armor |
| Legs | Leggings of Dying Candles | Plate Armor |
| Legs | Scourge Reaver’s Legplates | Plate Armor |
| Dagger | Lungbreaker | Weapon: One-Hand |
| Wand | Nightmare Ender | Weapon: Ranged |
Valithria Dreamwalker Tips by Role
Tank Tips
- Single Tank is Sufficient: Only Gluttonous Abominations require tanking
- Face Abominations Away: Gut Spray frontal cone must not hit raid
- Cleanse Gut Spray Immediately: Disease increases damage taken by 25%
- Assist with CC: Use stuns and interrupts on other enemies between Abomination spawns
- Taunt Blistering Zombies: Help ranged DPS kite them safely from distance
- Watch Portal Timing: Position near portals if you have a healing offspec option
- Call Out Spawns: Communicate Blazing Skeleton and Suppresser spawns immediately
Melee DPS Tips
- Priority Target Switching: Always kill Blazing Skeletons immediately when they spawn
- Interrupt Archmages: Use every interrupt cooldown available on Frostbolt Volley
- Respect Blistering Zombie Threat: Check threat meters constantly, prepare to run
- Move From Explosions: Be ready to disengage before Blistering Zombies die (15-yard range)
- Use All CC: Stuns, snares, and disarms help mitigate raid damage
- Avoid Ground Effects: Column of Frost and Mana Void will kill you
- Don’t Tunnel Vision: This fight is about add control, not DPS meters
Ranged DPS Tips
- Priority Awareness: Blazing Skeleton → Suppresser → Archmage → Zombie → Abomination
- Kite Blistering Zombies: Use snares and slows, never let them reach you
- Watch Your Feet: Risen Archmages spawn ground effects with only 2 seconds warning
- Interrupt When Possible: Frostbolt Volley should be interrupted by all classes capable
- Don’t Stand in Fire: Column of Frost deals massive damage plus fall damage
- Mana Void Awareness: Move immediately if standing in mana drain effects
- Spread Out: Avoid multiple people being hit by the same Column of Frost
- Pre-Cast on Spawns: Anticipate enemy spawn timing and have spells ready
Healer Tips
- Assign Portal Roles: Decide before pull who enters portals vs who heals raid
- Portal Positioning: Move toward portal spawn locations 10 seconds before they open
- First Cloud Immediately: Pop the nearest cloud upon entry to refresh Emerald Vigor
- Follow the Leader: Designate one healer to lead flight paths for cloud coordination
- Fly Low Before Exit: Minimize fall damage by flying near ground at 18-second mark
- Save Cooldowns: Hold major healing CDs until 80%+ progress with high Emerald Vigor stacks
- Coordinate Heroism: Use Bloodlust/Heroism immediately after final portal exit
- Guardian Spirit Timing: Holy Priests should use Guardian Spirit during Heroism burn
- Mana Conservation: Until 40+ stacks, use efficient heals rather than fast heals
- Watch Your Feet: Healers are common targets for Column of Frost
Valithria Dreamwalker Achievement Guide – Portal Jockey
Portal Jockey (10-Player & 25-Player)
Achievement Requirement: Enter every portal spawned by Valithria Dreamwalker before healing her to full health.
Difficulty: Easy (with coordination)
Reward: 10 achievement points
Category: Glory of the Icecrown Raider
How Portal Jockey Works
During the Valithria Dreamwalker encounter, 3 Nightmare Portals spawn every 45 seconds at random locations around the room. To earn Portal Jockey, every single portal that spawns throughout the entire fight must be entered by at least one player before it despawns.
Key Rules:
- Not a Personal Achievement: The entire raid works together – not every player needs to enter every portal, but every portal must be entered by someone
- 3 Players Required Per Phase: One player cannot enter all 3 portals in a single phase. You need at least 3 different players entering portals each cycle
- Must Exit Portals: Players must enter AND exit the portal. If Valithria reaches 100% HP while players are still inside the Emerald Dream, the achievement fails
- No Total Reset: If everyone enters portals simultaneously with nobody left outside, the encounter will reset and you’ll need to restart
- Portal Despawn = Failure: If any portal despawns without being entered (after its 10-second duration), the achievement attempt fails
Portal Jockey Strategy
Recommended Raid Setup:
- Assign 6-9 players as “portal team” (healers + DPS with good mobility)
- Assign 3 players to enter portals each phase
- Rotate assignments so everyone gets Emerald Vigor stacks
Execution Steps:
Before Pull:
- Designate Portal Groups (Alpha, Bravo, Charlie)
- Each group has 3 players
- Create a rotation schedule: Phase 1 = Alpha, Phase 2 = Bravo, Phase 3 = Charlie, Phase 4 = Alpha, etc.
During Encounter:
- When portals spawn, the assigned group calls out in voice chat
- All 3 assigned players position near different portals
- Enter portals when they open (after 15-second delay)
- Collect clouds quickly in Emerald Dream
- Exit before 20-second Dream State expires
- Next group prepares for next portal phase
Important Timing:
- Portals spawn every 45 seconds
- Portals open 15 seconds after spawning
- Dream State lasts 20 seconds
- Total cycle: 45 seconds between portal phases
Common Mistakes to Avoid:
- ❌ Healing Valithria too fast before all portals are entered
- ❌ Same player trying to enter multiple portals in one phase
- ❌ All players entering portals (causes encounter reset)
- ❌ Players staying in Dream too long (still inside when Valithria hits 100%)
- ❌ Forgetting to enter a portal (causes immediate achievement failure)
Pro Tips:
- Slow down healing during final 10-15% to ensure one more portal phase
- Assign a “Portal Caller” to announce portal spawns in voice chat
- Use raid markers on portal players for visual identification
- Have backup players ready in case someone dies
- Count portal phases out loud (“Portal 1… Portal 2… Portal 3…”)
Typical Portal Count:
- Fast Kill: 6-8 portal phases (18-24 portals total)
- Average Kill: 8-10 portal phases (24-30 portals total)
- Slow Kill: 10-12 portal phases (30-36 portals total)
Portal Jockey Solo Achievement
Can you get Portal Jockey solo?
Answer: No, Portal Jockey cannot be earned solo. The achievement requires 3 different players to enter portals each phase because one player physically cannot enter all 3 portals before they despawn. Even with maximum movement speed, the portal spawn locations are too spread out.
Minimum Players Required: 3 players (though 4-5 is safer for coverage)
Combining Portal Jockey with Regular Strategy
Portal Jockey is easily obtained during normal progression kills. Simply ensure your portal-entering healers rotate properly and that you don’t kill Valithria too quickly. Most raids earn this Icecrown Citadel achievement naturally without specific coordination.
Valithria Dreamwalker Abilities Reference
Understanding Valithria’s abilities is crucial for executing the encounter properly. Below is a complete reference of all abilities you’ll encounter.
Valithria Dreamwalker Spells and Ability Table
| Ability | Description |
|---|---|
| Summon Nightmare Portal | Every 45 seconds, Valithria Dreamwalker summons Nightmare Portals around her to join the Emerald Dream. Portals take 15 seconds to open and allow up to 8 players to enter (25-man). |
| Emerald Vigor | Invigorates the target with dreams, regenerating 200 Mana every 3 sec. The target’s damage and healing will also be increased by 10%. Stacks up to 100 times. Lasts 40 sec. Obtained by collecting Nightmare Clouds in the Emerald Dream (Normal mode). |
| Twisted Nightmares | Afflicts the target with nightmares, dealing 200 Nature damage per second. In addition, the target will regenerate 200 Mana every 3 sec. The target’s damage and healing will also be increased by 10%. Stacks up to 100 times. Lasts 40 sec. Replaces Emerald Vigor in Heroic difficulty. |
| Dreamwalker’s Rage | Upon reaching 100% HP, Valithria Dreamwalker deals 10,000,000 Nature damage to all surrounding enemies and ends the encounter. This ability automatically triggers when you successfully heal Valithria to full health, completing the encounter. |
Ability Details and Usage
Summon Nightmare Portal:
- Frequency: Every 45 seconds throughout the fight
- Player Limit: Up to 8 players in 25-man, up to 4 players in 10-man
- Duration: Portals remain open for ~10 seconds after activation
- Purpose: Allows players to enter the Emerald Dream to gain powerful healing/damage buffs
Emerald Vigor (Normal Mode):
- Source: Collected from Nightmare Clouds inside the Emerald Dream
- Effect per Stack: +10% healing/damage + 200 mana/3 seconds
- Maximum Power: At 100 stacks = +1000% healing/damage output
- Strategy: This is the key mechanic that allows healers to pump massive healing into Valithria
- Duration Management: 40-second duration creates overlap between portal phases (45-second cycle)
Twisted Nightmares (Heroic Mode):
- Source: Collected from red Nightmare Clouds in Heroic difficulty
- Benefits: Identical to Emerald Vigor (+10% per stack, mana regeneration)
- Penalty: 200 nature damage per second per stack
- Scaling Damage:
- 10 stacks = 2,000 damage/second
- 20 stacks = 4,000 damage/second
- 30 stacks = 6,000 damage/second
- 50 stacks = 10,000 damage/second
- 100 stacks = 20,000 damage/second (lethal)
- Strategy: Requires constant self-healing while maintaining Valithria healing
Dreamwalker’s Rage:
- Trigger: Automatically activates when Valithria reaches 100% health
- Effect: Instantly kills all remaining enemies in the room
- Outcome: Encounter completion, loot becomes available
- Important: Make sure all players exit portals before Valithria reaches 100%, or Portal Jockey achievement will fail
Valithria Dreamwalker FAQ – Common Questions Answered {#faq}
Can you solo Valithria Dreamwalker?
Yes, on this Valithria Dreamwalker Guide we will tell you it can be soloed, but only by classes with healing specializations. Holy Paladins are the easiest class for soloing (15-25 minutes), followed by Holy Priests, Restoration Druids, and Restoration Shamans. Pure DPS classes like Warriors, Rogues, Hunters, Mages, Warlocks, and Death Knights cannot solo this encounter because they lack the healing abilities required to heal Valithria 18 million HP. Hybrid DPS specs (Retribution Paladin, Shadow Priest, Balance Druid, Enhancement Shaman) can technically solo with a complete healing gear set, but it requires 40-60+ minutes and perfect execution.
How to heal Valithria Dreamwalker effectively?
To heal Valithria Dreamwalker effectively, follow these steps: (1) Enter Nightmare Portals every 45 seconds to collect Nightmare Clouds, (2) Build Emerald Vigor stacks to 40-60+ stacks for maximum healing output, (3) Assign 1-2 healers to stay outside portals for raid healing, (4) Coordinate with other healers to pop clouds together inside the Emerald Dream, (5) Save all healing cooldowns (Guardian Spirit, Divine Favor, Avenging Wrath) for the burn phase at 80%+ health, and (6) Use Heroism/Bloodlust immediately after exiting the final portal with maximum stacks. At 60+ Emerald Vigor stacks, your healing is increased by 600%, making even small heals extremely powerful.
How to solo Valithria Dreamwalker without a healer?
You cannot solo Valithria Dreamwalker without a healer specialization. The encounter requires healing Valithria from 50% to 100% health (18 million healing total). Pure DPS classes lack the healing abilities to target other players or NPCs. Bandages, healing potions, consumables, and engineering items provide negligible healing and cannot be used on Valithria. The only way for non-healing classes to complete this encounter is to bring a second player with healing capabilities or to level a healing specialization alt. Classes that can solo include Holy Paladin, Holy Priest, Discipline Priest, Restoration Druid, and Restoration Shaman.
What is the best class to solo Valithria Dreamwalker?
Holy Paladin is the easiest and fastest class for soloing Valithria Dreamwalker. Paladins combine strong healing output, plate armor for survivability, multiple healing cooldowns, and the ability to handle adds effectively. Expected solo time is 15-25 minutes with proper gear and strategy.
When should you use Heroism/Bloodlust on Valithria Dreamwalker?
Use Heroism/Bloodlust when Valithria reaches 80% health AND immediately after healers exit a portal with high Emerald Vigor stacks (40-60+). Wait for the Dream State phase to complete so all healers are present with maximum stacks. Combine Heroism with all healing cooldowns (Guardian Spirit, Divine Favor, Avenging Wrath, Nature’s Swiftness) for maximum burst healing.