 World of Warcraft Guides, Lore, Addons & News – Noob to Boss From Azeroth's Newbie to Champion – World of Warcraft Guides
Shaman totems are not automatically available — you must complete specific class quest chains to unlock each totem family. These quests are essential for gaining access to your core abilities like Earthbind Totem, Windfury Totem, and Healing Stream Totem. While some quest chains are longer or more complex than others, completing them is crucial for both efficient leveling and strong endgame performance.
This shaman class quests guide provides a complete overview of all four Shaman totem quest chains, featuring detailed walkthroughs, maps, the optimal completion order, and practical tips to help you finish them efficiently. Whether you’re new to the class or aiming to perfect your leveling path, this guide ensures
Why Complete Shaman Totem Quests?
Essential for Class Functionality: Without these quests, you cannot use any totems of that element. No Earth Totem quest = no Earthbind Totem for kiting. No Air Totem quest = no Windfury Totem for groups.
Smooth Leveling Experience: Totems dramatically improve your leveling speed and survivability. Earthbind Totem alone reduces damage taken by 30-50% through kiting.
Mandatory for Groups: You cannot effectively participate in dungeons or raids without access to key totems like Windfury, Tremor, and resistance totems.
Good Experience Rewards: Quest chains provide solid XP that contributes to your leveling progress.
For detailed information on what each totem does and optimal usage, see our Shaman totems guide.
Quest Completion Priority
| Quest | Level | Difficulty | Time | Priority |
|---|---|---|---|---|
| Earth Totem | 4 | ⭐ Very Easy | 15-20 minutes | 🔥 DO IMMEDIATELY |
| Fire Totem | 10 | ⭐⭐ Easy | 30-45 minutes | ✅ Complete ASAP |
| Water Totem | 20 | ⭐⭐⭐⭐ Long | 2-3 hours | ⚠️ Optional for solo, mandatory for healing |
| Air Totem | 30 | ⭐ Very Easy | 10-15 minutes | 🔥 DO BEFORE DUNGEONS |
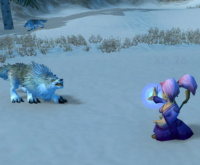
Earth Totem Quest (Level 4)
Unlocks: Earthbind Totem, Stoneskin Totem, Strength of Earth Totem, Stoneclaw Totem, Tremor Totem
Importance: 🔥🔥🔥🔥🔥 ABSOLUTELY MANDATORY
Earthbind Totem is your single most important leveling tool. Drop everything and complete this quest the moment you reach level 4.
Quest Chain: “Call of Earth”
Starting Location (Varies by Race):
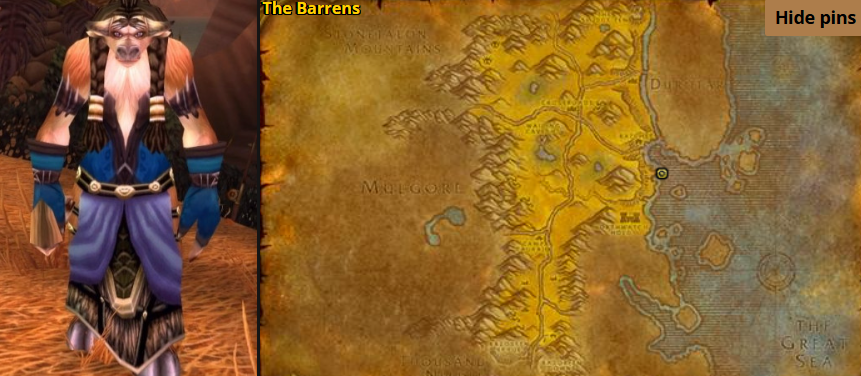
Orc/Troll: Valley of Trials, Durotar – Speak with Canaga Earthcaller (your class trainer)
Tauren: Camp Narache, Mulgore – Speak with Seer Graytongue (your class trainer)
Orc/Troll Quest Steps
Step 1: Call of Earth (Part 1)
- Speak with Canaga Earthcaller in Valley of Trials
- Task: Kill Felstalkers in the northern cave and collect 2x Felstalker Hoof
- Location: Northern cave in Valley of Trials (around coordinates 40.6, 67.0)
- Difficulty: Very easy – Felstalkers are level 2-3, high drop rate
- Return to Canaga Earthcaller
Step 2: Call of Earth (Part 2)
- Canaga gives you Earth Sapta consumable
- Travel to hidden path south of The Den in Durotar
- Path entrance: Coordinates 41.6, 73.3
- Follow path to Spirit Rock at coordinates 44.0, 76.1
- Use Earth Sapta at Spirit Rock
- Speak with Minor Manifestation of Earth
Step 3: Call of Earth (Final)
- Minor Manifestation sends you back to Canaga Earthcaller
- Turn in quest to receive Earth Totem and Stoneskin Totem rank 1
Total Time: 15-20 minutes
Experience Gained: ~840 XP
Tauren Quest Steps
Step 1: Call of Earth (Part 1)
- Speak with Seer Graytongue in Camp Narache
- Task: Kill Flatland Prowlers and collect 2x Flatland Prowler Claw
- Location: Around Camp Narache in Mulgore
- Difficulty: Very easy – level 2-3 enemies, high drop rate
- Return to Seer Graytongue
Step 2: Call of Earth (Part 2)
- Seer gives you Earth Sapta consumable
- Travel to Red Rocks in southern Mulgore
- Coordinates: 38.5, 81.2
- Use Earth Sapta at the large red rock formation
- Speak with Minor Manifestation of Earth
Step 3: Call of Earth (Final)
- Return to Seer Graytongue in Camp Narache
- Receive Earth Totem and Stoneskin Totem rank 1
Total Time: 15-20 minutes
Experience Gained: ~840 XP
Tips for Earth Totem Quest
✓ Complete this immediately at level 4 – don’t delay
✓ The hidden paths are not marked on map – follow coordinates carefully
✓ Earth Sapta is consumed on use – don’t accidentally use it early
✓ This quest has zero combat difficulty – just travel time
Fire Totem Quest (Level 10)
Unlocks: Searing Totem, Fire Nova Totem, Magma Totem, Flametongue Totem, Fire Resistance Totem, Frost Resistance Totem
Importance: ✅✅✅✅ Complete ASAP
Searing Totem provides solid sustained damage for leveling. Fire Resistance Totem becomes critical in endgame raids.
Quest Chain: “Call of Fire”
Starting Location: Any Shaman trainer in Orgrimmar, Thunder Bluff, Durotar, or Mulgore
Starting NPC: Your Shaman class trainer
Quest Steps (All Races)
Step 1: Call of Fire (Part 1)
- Speak with any Shaman trainer to start quest
- Task: Travel to The Barrens and speak with Kranal Fiss
- Location: The Barrens – Coordinates 38.6, 58.6 (southwest of The Crossroads)
- Travel time: 5-10 minutes from Orgrimmar, 15-20 from Thunder Bluff
Step 2: Call of Fire (Part 2)
- Kranal Fiss sends you to Telf Joolam in Durotar
- Location: Top of large mountain in Durotar – Coordinates 38.5, 58.9
- IMPORTANT: Path up the mountain starts on north side – narrow and easy to miss
- Follow the winding path carefully to avoid falling
- Speak with Telf Joolam at the summit

Step 3: Call of Fire (Part 3)
- Telf Joolam tasks you with collecting two items:
- Fire Tar – Drops from Razormane casters (Geomancer, Thornweaver) in The Barrens
- Reagent Pouch – Drops from Burning Blade Cultists in Durotar
Fire Tar Location:
- Area: The Barrens around Coordinates 44.0, 63.0 (Razormane camps)
- Enemies: Razormane Geomancer, Razormane Thornweaver (level 9-12)
- Drop Rate: Very high (~80%) – usually first kill
Reagent Pouch Location:
- Area: Durotar around Coordinates 52.0, 55.0 (Burning Blade Coven)
- Enemies: Burning Blade Cultist (level 11-13)
- Drop Rate: Very high (~80%) – usually first kill
Step 4: Call of Fire (Part 4)
- Return to Telf Joolam with both items
- He gives you Fire Sapta consumable
- Click the Brazier of the Dormant Flame next to Telf
- Use Fire Sapta to summon Minor Manifestation of Fire (level 10 elemental)
- Kill the elemental (easy solo fight – use Earthbind Totem to kite if needed)
- Click brazier again to receive Torch of the Eternal Flame
Step 5: Call of Fire (Final)
- Return to Kranal Fiss in The Barrens
- Turn in quest to receive Fire Totem and Searing Totem rank 1
Total Time: 30-45 minutes
Experience Gained: ~1550 XP
Tips for Fire Totem Quest
✓ Complete this quest immediately at level 10
✓ Path up Telf’s mountain is tricky – look for north-side entrance
✓ Both collection items have high drop rates – shouldn’t take more than 1-2 kills each
✓ Minor Manifestation of Fire is easy – just kite with Earthbind if concerned
✓ Can complete while doing other Barrens/Durotar quests to save time
Water Totem Quest (Level 20)
Unlocks: Healing Stream Totem, Mana Spring Totem, Fire Resistance Totem, Disease Cleansing Totem, Poison Cleansing Totem
Importance: ⚠️ Optional for solo leveling, MANDATORY for healing dungeons/raids
This is the longest and most tedious Shaman quest chain. Requires extensive travel across three zones with level ranges 20-30.
Should You Do This Quest?
Complete It If:
- You plan to heal dungeons frequently while leveling
- You want access to Healing Stream Totem for group content
- You prefer having all your totems available
- You enjoy completion and don’t mind the travel time
Skip It If:
- Leveling purely solo as Enhancement or Elemental
- Don’t plan to heal groups until level 60
- Want to maximize leveling speed
- Can always return later to complete it
Quest Chain: “Call of Water”
Starting Location: Any Shaman trainer in Orgrimmar, Thunder Bluff, Durotar, or Mulgore
Quest Steps (All Races)
Step 1: Call of Water (Part 1)
- Speak with any Shaman trainer to start quest
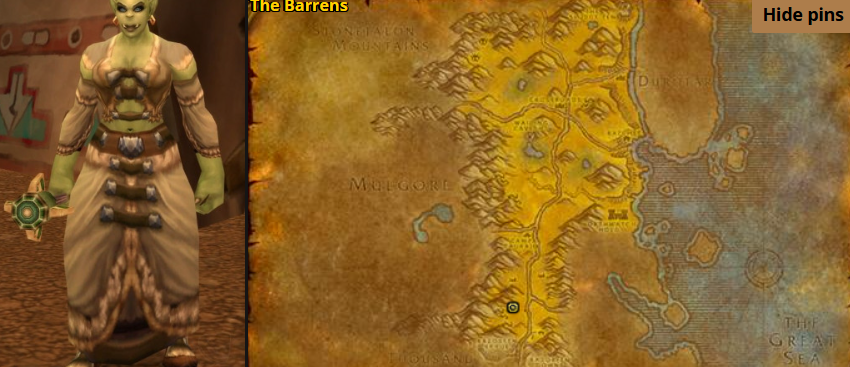
- Task: Travel to The Barrens and speak with Islen Waterseer
- Location: The Barrens – Coordinates 65.8, 43.8 (northeast, near Ratchet)
Step 2: Call of Water (Part 2)
- Islen sends you to Brine in southern Barrens
- Location: Far south Barrens – Coordinates 45.0, 87.0 (near Southfury River)
- Travel time: 10-15 minutes from Ratchet area
Step 3: Call of Water (Part 3) – Brown Waterskin
- Brine gives you Empty Brown Waterskin
- Task: Fill it at the pond directly below her hut
- Location: Pond at coordinates 45.1, 87.8
- Use Empty Brown Waterskin while standing in/near pond
- Return to Brine with Filled Brown Waterskin
Step 4: Call of Water (Part 4) – Red Waterskin
- Brine gives you Empty Red Waterskin
- Task: Travel to Tarren Mill in Hillsbrad Foothills and fill it at the well
- Location: Hillsbrad Foothills – Tarren Mill well in town center (Coordinates 62.0, 20.0)
- DANGER: Alliance territory – be careful if PvP server
- Use Empty Red Waterskin at the well in center of Tarren Mill
- Travel Time: 20-30 minutes from southern Barrens (long journey through multiple zones)
Step 5: Call of Water (Part 5) – Blue Waterskin
- Return to Brine with Filled Red Waterskin
- Brine gives you Empty Blue Waterskin
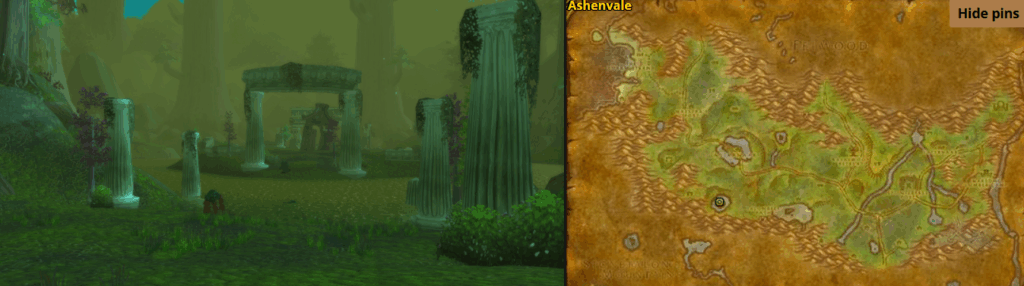
- Task: Travel to Ruins of Stardust in Ashenvale and fill it
- Location: Ashenvale – Coordinates 34.0, 48.0 (northwest of The Crossroads)
- DANGER: Alliance territory with enemy NPCs – stealth/careful approach recommended
- Use Empty Blue Waterskin at the moonwell in Ruins of Stardust
- Travel Time: 15-20 minutes from southern Barrens
Step 6: Call of Water (Part 6) – Return to Brine
- Return to Brine with Filled Blue Waterskin
- Brine gives you Vial of Purest Water
- Task: Return to Islen Waterseer in northern Barrens
Step 7: Call of Water (Part 7) – Silverpine Forest
- Islen Waterseer sends you to Silverpine Forest
- She gives you Water Sapta consumable
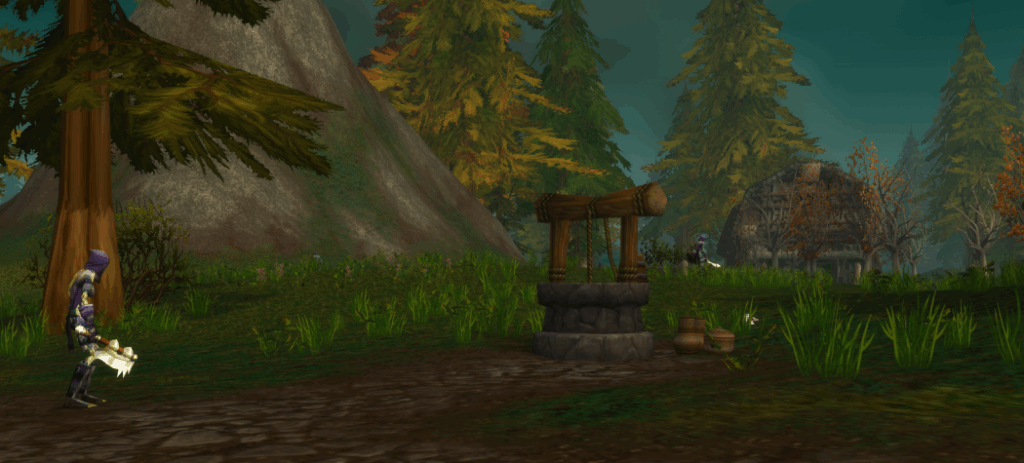
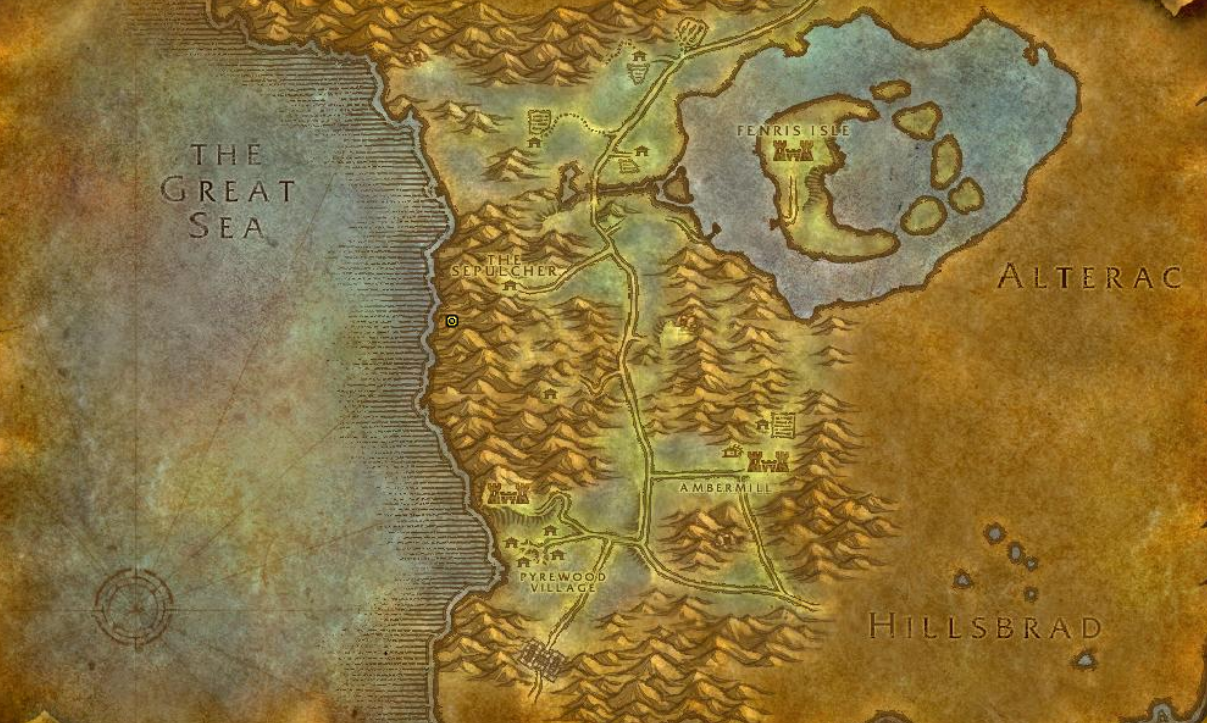
- Task: Travel to hidden cave behind The Sepulcher
- Location: Silverpine Forest – Behind the inn at The Sepulcher (Coordinates 44.2, 50.7)
Finding the Hidden Cave:
- Go to The Sepulcher (Horde town in Silverpine)
- Walk behind the inn building
- Look for two large trees you can climb between
- Climb over the rocks (you’ll take minor fall damage – heal after each drop)
- Follow path down to small cave area
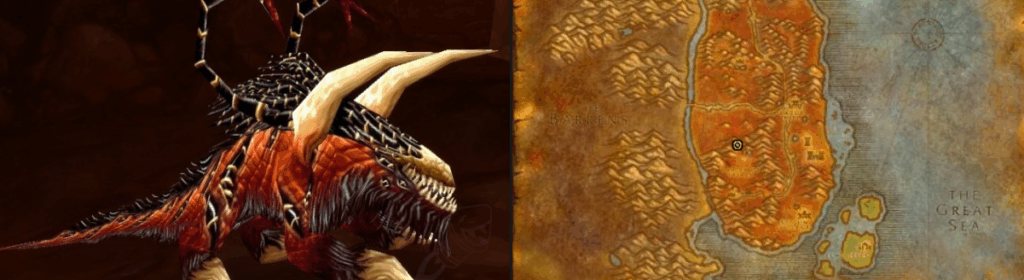
Step 8: Call of Water (Part 8) – Combat
- Drink Water Sapta in the cave
- Corrupt Minor Manifestation of Water spawns (level 20 elite-tagged enemy)
- Kill it and loot Corrupt Manifestation’s Bracers
- Combat Tips: Use Earthbind Totem to kite, heal with Healing Wave as needed. Soloable but can be challenging – consider bringing friend if struggling
Step 9: Call of Water (Part 9) – Purification
- After killing Corrupt Manifestation, click Brazier of Everfount in cave
- Speak with Minor Manifestation of Water that appears
- Receive Shard of Water
Step 10: Call of Water (Final)
- Return to Islen Waterseer in The Barrens (long travel back)
- Turn in Shard of Water
- Receive Water Totem and Healing Stream Totem rank 1
Total Time: 2-3 hours (mostly travel)
Experience Gained: ~3200 XP
Tips for Water Totem Quest
⚠️ This is the most time-consuming Shaman quest – plan accordingly
✓ Complete while doing other quests in Barrens/Hillsbrad/Ashenvale to maximize efficiency
✓ Tarren Mill and Ruins of Stardust are Alliance areas – be cautious on PvP servers
✓ Bring healing potions for the Corrupt Manifestation fight
✓ Set Hearthstone strategically to minimize travel time
✓ Can skip entirely if solo leveling – return at 60 if needed
Air Totem Quest (Level 30)
Unlocks: Windfury Totem, Grace of Air Totem, Windwall Totem, Nature Resistance Totem, Grounding Totem, Tranquil Air Totem, Sentry Totem
Importance: 🔥🔥🔥🔥🔥 MANDATORY – DO BEFORE RUNNING DUNGEONS
Windfury Totem is THE most powerful group buff in Classic WoW. This quest is incredibly short and easy – there’s no excuse not to complete it immediately at level 30.
Quest Chain: “Call of Air”
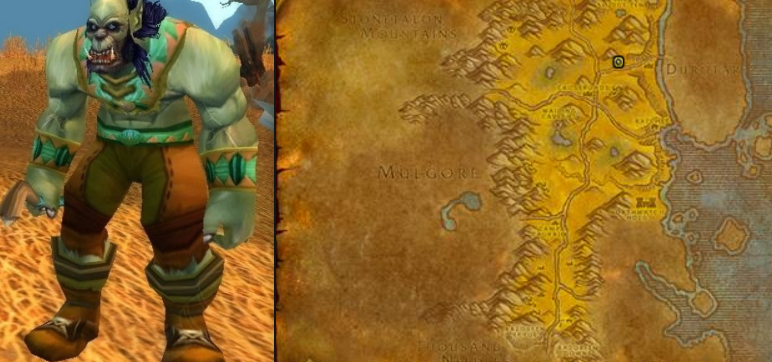
Starting Location: Shaman trainer in Orgrimmar or Thunder Bluff
Quest Steps (All Races)
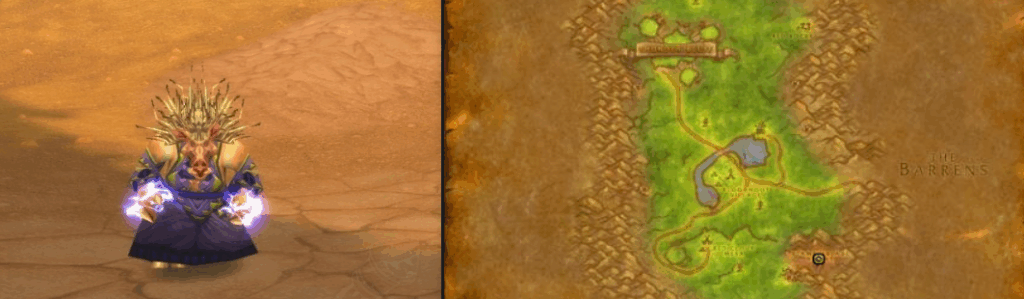
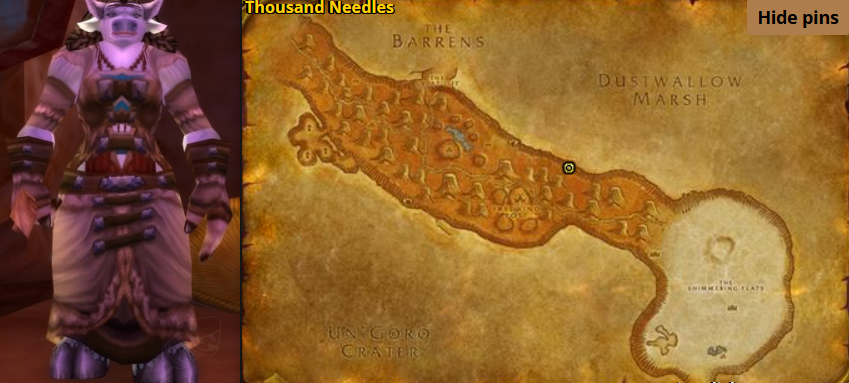
Step 1: Call of Air (Only Step)
- Speak with Shaman trainer in Orgrimmar or Thunder Bluff
- Task: Travel to Thousand Needles and speak with Prate Cloudseer
- Location: Thousand Needles – Coordinates 30.3, 24.2 (northern wall of the zone)
Finding Prate Cloudseer:
- Enter Thousand Needles from The Barrens
- Head to the northern cliffs/wall
- Look for a path leading up the cliff face
- Follow path to small cave with Prate Cloudseer inside
Step 2: Turn In
- Speak with Prate Cloudseer
- Immediately receive Air Totem and 1-hour Swift Wind buff (+30% movement speed)
- Quest complete!
Total Time: 10-15 minutes (just travel time)
Experience Gained: ~2300 XP
Tips for Air Totem Quest
✓ Easiest Shaman quest by far – just travel and turn in
✓ Complete this BEFORE running any dungeons at level 30+
✓ Windfury Totem makes you incredibly valuable in groups
✓ Swift Wind buff is nice bonus for questing after completion
✓ Path up the cliff is straightforward – can’t miss it
Optimal Quest Completion Order
Recommended Timeline
Level 4: Complete Earth Totem quest immediately (15-20 min)
Level 10: Complete Fire Totem quest as soon as available (30-45 min)
Level 20:
- Solo Leveling (Enhancement/Elemental): Skip Water Totem quest, continue leveling
- Dungeon/Healing Focus: Complete Water Totem quest (2-3 hours)
Level 30: Complete Air Totem quest before first dungeon run (10-15 min)
Level 60: If skipped Water Totem earlier, return to complete it for endgame healing
Time-Saving Tips
Quest Batching: Complete totem quests while doing other quests in the same zones
- Fire Totem: Pairs well with Barrens/Durotar questing (levels 10-20)
- Water Totem: Combine with Hillsbrad and Ashenvale quest chains (levels 20-30)
- Air Totem: Quick detour during Thousand Needles questing (level 30+)
Hearthstone Management: Set Hearthstone to quest hubs near totem quest locations to minimize travel time
Use Flight Paths: Unlock all flight paths as you travel for totem quests – saves time later
Group Up: Water Totem’s Corrupt Manifestation fight is easier with a partner
What Totems Does Each Quest Unlock?
Earth Totem Unlocks
- Earthbind Totem – Slows enemies (CRITICAL for leveling)
- Stoneskin Totem – Reduces physical damage
- Strength of Earth Totem – Increases Strength/Agility (essential for groups)
- Stoneclaw Totem – Taunts enemies
- Tremor Totem – Removes fear effects (CRITICAL for raids)
Fire Totem Unlocks
- Searing Totem – Single-target damage
- Fire Nova Totem – AoE burst damage
- Magma Totem – AoE sustained damage
- Flametongue Totem – Weapon buff (weak, skip it)
- Fire Resistance Totem – Fire resistance (essential for Molten Core/BWL)
- Frost Resistance Totem – Frost resistance (essential for Naxxramas)
Water Totem Unlocks
- Healing Stream Totem – Passive healing (great for dungeons)
- Mana Spring Totem – Mana regeneration (situational)
- Fire Resistance Totem – Fire resistance (duplicate from Fire tree)
- Disease Cleansing Totem – Removes diseases
- Poison Cleansing Totem – Removes poisons (critical for Naxxramas)
Air Totem Unlocks
- Windfury Totem – MOST POWERFUL BUFF IN GAME (mandatory)
- Grace of Air Totem – Agility buff (excellent for twisting)
- Windwall Totem – Ranged damage reduction (rarely used)
- Nature Resistance Totem – Nature resistance (AQ40 encounters)
- Grounding Totem – Spell redirect (godlike in PvP)
- Tranquil Air Totem – Threat reduction (threat-sensitive fights)
- Sentry Totem – Remote viewing (niche utility)
Frequently Asked Questions
Can I skip any totem quests?
– Fire Totem (Level 10): NO – highly recommended. Searing Totem helps leveling, and Fire Resistance Totems are critical for raids.
– Water Totem (Level 20): YES – optional if solo leveling as Enhancement/Elemental. Complete it if you plan to heal dungeons or for endgame raids.
– Air Totem (Level 30): NO – absolutely mandatory. Windfury Totem is the most powerful group buff in Classic.
What happens if I don’t complete totem quests?
Example: No Earth Totem quest = zero access to Earthbind, Strength of Earth, Tremor Totems, etc.
Skipping quests severely cripples your effectiveness in both leveling and group content.
Can I complete these quests at higher levels?
Many players skip the Water Totem quest while leveling and return at level 60 to complete it for raid healing.
Do I need to complete quests in order?
Earth (4) → Fire (10) → Water (20, optional) → Air (30)
This matches unlock levels and smooth leveling progression.
Are these quests soloable?
– Water: Mostly soloable, but the Corrupt Manifestation fight is elite-tagged and can be challenging.
Bring a friend if struggling, though Earthbind kiting and healing make it possible solo.
Conclusion
Completing your Shaman totem quests is non-negotiable for effective gameplay. While the Water Totem chain is long and tedious, the Earth, Fire, and Air quests are quick and provide essential abilities that define the Shaman class.
Priority Summary
🔥 MUST DO IMMEDIATELY:
- Earth Totem (Level 4) – Earthbind is life
- Fire Totem (Level 10) – Quick and valuable
- Air Totem (Level 30) – Windfury defines your class
⚠️ OPTIONAL (But eventually needed):
- Water Totem (Level 20) – Skip for solo, complete for healing
Key Takeaways
✓ Earth and Air totems are absolutely mandatory – complete ASAP
✓ Fire Totem is quick and provides valuable abilities – do it at level 10
✓ Water Totem is long (2-3 hours) but needed for healing – skip if solo leveling
✓ Windfury Totem from Air quest makes you incredibly valuable in groups
✓ Can complete totem quests at any level after minimum requirement
✓ All quests are soloable except Water Totem combat may need help
Related Guides
- Shaman Leveling Guide – General leveling overview
- WoW Classic Enhancement Shaman Leveling – Best leveling spec
- WoW Classic Elemental Shaman Leveling – Caster leveling alternative
- WoW Classic Restoration Shaman Leveling – Healing-focused leveling
May your totems guide you to level 60, and may your Windfury procs be plentiful!