Totems are the defining feature of the Shaman class in WoW Classic, providing unique buffs, crowd control, and utility that no other class can replicate. Understanding which totems to use in different situations – whether leveling, raiding, dungeons, or PvP – separates good Shamans from exceptional ones.
This WoW Classic Shaman Totems Guide covers all Shaman totems, their optimal usage scenarios, totem twisting techniques for advanced players, and how to maximize your effectiveness in every aspect of Classic WoW.
Understanding Shaman Totems
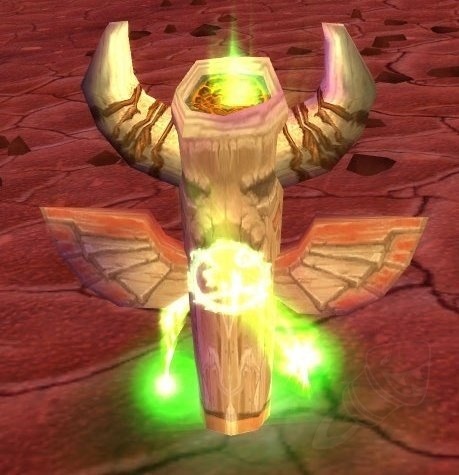
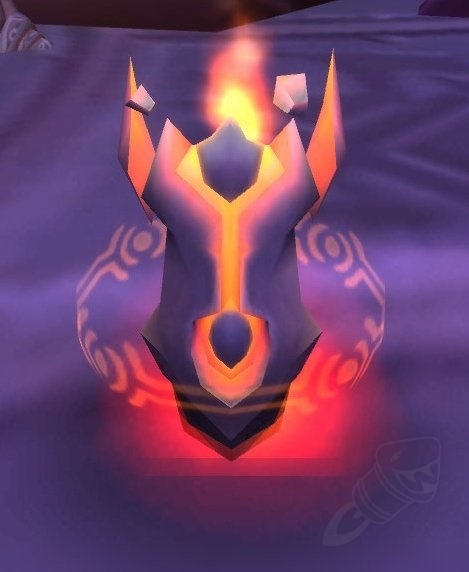
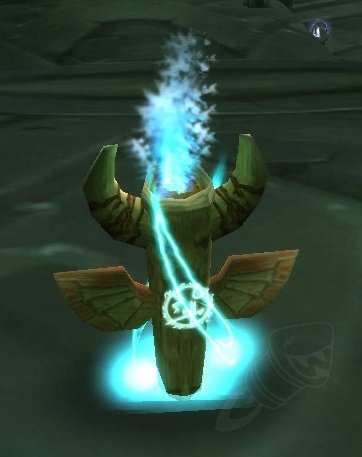
Totems are stationary objects that Shamans place on the ground, providing benefits to all party members within range. Each totem belongs to one of four elemental categories: Earth, Fire, Water, and Air.
Core Mechanic: You can only have one totem of each element active at a time, allowing a maximum of four simultaneous totems. Choosing the right combination for each situation is crucial to Shaman mastery.
Totem Range: Base range is 20-30 yards depending on the totem. The Totemic Mastery talent (Restoration tree) extends this range to 40 yards, making it significantly easier to keep all party members buffed.
How to Acquire Totems: Shamans must complete specific class quest chains to unlock totem families. See our Shaman quest guide for detailed walkthroughs of these essential questlines.
Earth Totems
Earth totems provide physical buffs, crowd control, and defensive benefits.
Strength of Earth Totem ⭐⭐⭐⭐⭐
Effect: Increases Strength and Agility of party members within range.
Best For: Melee DPS groups (Warriors, Rogues, Feral Druids), tanks needing threat generation
Usage: Your default Earth totem for most group content. The Strength increase boosts Attack Power for melee classes, while Agility provides crit chance and armor. Essential for maximizing melee DPS in raids.
Ranks: Available at levels 10, 24, 38, 52, 60. Always keep current rank trained.
Earthbind Totem ⭐⭐⭐⭐⭐
Effect: Pulses every 3 seconds, slowing all enemies within range by 50% for 5 seconds.
Best For: Solo leveling (critical), kiting mechanics in raids, PvP, escaping dangerous situations
Usage: The most important totem for leveling. Place between yourself and enemies to enable kiting, dramatically reducing damage taken. In raids, use for kiting adds or controlling enemy movement. In PvP, essential for controlling melee classes and creating distance.
Pro Tip: The slow is equivalent to a Rank 3 Hamstring, making this one of the strongest slows in Classic WoW.
Stoneskin Totem ⭐⭐⭐
Effect: Reduces physical damage taken by party members by 30 damage per hit (max rank).
Best For: Tanking multiple weak enemies, leveling dungeons, situations with many small hits
Usage: Not useful against raid bosses (damage too high for flat reduction to matter), but excellent when your tank has aggro on 5+ enemies that each hit for 50-150 damage. The damage reduction stacks up significantly across multiple attacks.
When to Skip: Single-target boss fights, situations where Strength of Earth provides more value.
Tremor Totem ⭐⭐⭐⭐⭐
Effect: Pulses every 5 seconds, removing Fear, Charm, and Sleep effects from party members.
Best For: Fear-heavy raid encounters (Onyxia, Nefarian, Magmadar), PvP against Warlocks/Warriors
Usage: CRITICAL for Horde since they lack Fear Ward. Drop this totem before fear mechanics occur if you know the timing – it pulses immediately upon placement, then every 5 seconds. With accurate boss timers, you can time placement to break fear instantly.
Raid Encounters: Mandatory for Onyxia (Deep Breath fear), Nefarian Phase 1 (class call fears), Magmadar (panic), and various other encounters.
Stoneclaw Totem ⭐
Effect: Summons a totem that taunts enemies and absorbs damage.
Best For: Emergency escape while leveling, niche PvP scenarios
Usage: Rarely used. Earthbind Totem is superior for escaping in almost every situation. Stoneclaw has extremely limited health and dies quickly to any serious damage. Can occasionally buy you 2-3 seconds if you need to escape multiple enemies.
Fire Totems
Fire totems provide damage, area denial, and resistance buffs.
Searing Totem ⭐⭐⭐
Effect: Attacks a single target repeatedly with fire bolts every 2-3 seconds.
Best For: Solo grinding in one location, dungeon boss fights, sustained single-target damage
Usage: Decent damage over time but requires the enemy to survive 30+ seconds to get full value. Skip when burst-killing quest mobs. Excellent when grinding the same area for extended periods or fighting dungeon bosses where you can set up before pulls.
Ranks: Available at levels 10, 20, 30, 40, 50, 60.
Magma Totem ⭐⭐⭐⭐
Effect: Deals fire damage to all enemies within range every 2 seconds for 20 seconds.
Best For: Multi-target pulls (2+ enemies), dungeon AoE situations, farming spots with grouped enemies
Usage: Replace Searing Totem when fighting multiple enemies. The AoE damage adds up quickly across 3-4 targets. Works excellently in dungeons when tank pulls multiple packs. Also useful for breaking CC in PvP (Polymorph, Sap).
Mana Cost: More expensive than Searing – use strategically.
Fire Nova Totem ⭐⭐
Effect: Explodes after 5 seconds, dealing significant AoE fire damage to all nearby enemies.
Best For: Burst AoE damage on grouped enemies, PvP bomb combos
Usage: High damage potential but telegraphed – smart players will move away. Best used when enemies are CC’d, stunned, or unaware. Can be devastating in PvP if hidden in grass/objects. Generally too mana-expensive for regular leveling use.
PvP Note: Experienced players will destroy this totem immediately. Use as bait or distraction.
Flametongue Totem ⭐
Effect: Provides party members with weapon enchant adding fire damage to attacks.
Best For: Nothing – completely outclassed by Windfury Totem
Usage: Never use this in serious content. Windfury Totem provides massively more value for melee groups. The only time you’d even consider this is if your entire group is somehow immune to Windfury effects (which doesn’t happen in practice).
Fire Resistance Totem ⭐⭐⭐⭐⭐
Effect: Increases Fire Resistance of party members by 60 (max rank).
Best For: Molten Core, Blackwing Lair fire bosses, any encounter with heavy fire damage
Usage: Essential for early endgame raiding. Ragnaros, Vaelastrasz, Firemaw, and many other bosses deal massive fire damage. This totem can mean the difference between a wipe and a kill. Always use when facing fire-damage encounters.
Raids: Molten Core (most bosses), Blackwing Lair (Vaelastrasz, Firemaw), AQ40 (select bosses).
Frost Resistance Totem ⭐⭐⭐⭐
Effect: Increases Frost Resistance of party members by 60 (max rank).
Best For: Naxxramas (Sapphiron, Kel’Thuzad), frost-heavy encounters
Usage: Less commonly needed than Fire Resistance until Naxxramas. When you do need it, it’s absolutely critical. Sapphiron’s frost breath will one-shot players without sufficient resistance.
Water Totems
Water totems provide healing, mana regeneration, and cleansing effects.
Healing Stream Totem ⭐⭐⭐
Effect: Heals party members within range every 2 seconds for its duration.
Best For: Dungeons, grinding in one location, supplemental raid healing
Usage: Provides steady passive healing over time. Most effective when your group is stationary (dungeon pulls, raid boss fights). Not mana-efficient for solo questing since you’re constantly moving. Excellent supplement to active healing in dungeons.
Healing Output: Low but consistent. Won’t save anyone from burst damage, but reduces healer workload over longer fights.
Mana Spring Totem ⭐⭐⭐
Effect: Restores mana to party members every 2 seconds for its duration.
Best For: Caster-heavy groups, long boss encounters, healer groups
Usage: Situational usefulness. If you’re in a melee-heavy group (3 Warriors + 1 Rogue), this totem does nothing for them – use Fire/Frost Resistance instead. In caster groups or healer groups, provides modest mana regeneration that adds up over longer encounters.
Efficiency Note: Often not worth the mana cost to cast it in 5-man dungeons. More valuable in raids with proper group compositions.
Mana Tide Totem ⭐⭐⭐⭐⭐
Effect: Restores 24% of party members’ total mana over 12 seconds (max rank). Requires 31 points in Restoration talents.
Best For: Raid healing groups, caster DPS groups, early endgame content
Usage: Extremely powerful group-wide mana cooldown in early raids (MC, BWL). Restoration Shamans are often rotated between caster groups specifically to drop Mana Tide Totem, then swapped out for the next Shaman. Essentially a group-wide mana potion on a 5-minute cooldown.
Late Game: Becomes less critical in AQ40/Naxxramas as gear improves and classes become less mana-starved. Many Shamans eventually respec out of this talent.
Disease Cleansing Totem ⭐⭐⭐
Effect: Removes one disease from party members every 5 seconds (also cleanses immediately on placement).
Best For: Disease-heavy encounters, situations where entire group needs cleansing
Usage: Most of the time, Cure Disease (single-target) is sufficient. Use Disease Cleansing Totem when your entire group is affected by diseases and single-target dispelling would be too slow. Pulses on placement, then every 5 seconds after.
Raid Encounters: Useful on specific bosses with group-wide disease mechanics.
Poison Cleansing Totem ⭐⭐⭐⭐
Effect: Removes one poison from party members every 5 seconds (also cleanses immediately on placement).
Best For: Naxxramas (Loatheb encounter), poison-heavy bosses
Usage: Similar to Disease Cleansing Totem but for poisons. Critical for Loatheb in Naxxramas where entire raid gets stacking poison debuffs. Can save your raid from wipes on specific encounters.
Note: Pulses immediately on drop, making it excellent for emergency group-wide cleansing.
Air Totems
Air totems provide powerful offensive buffs, resistance, and utility effects.
Windfury Totem⭐⭐⭐⭐⭐
Effect: Grants party members a weapon buff for 10 seconds that gives 20% chance for extra attack with +445 attack power (max rank).
Best For: Melee DPS groups, absolutely mandatory in raids
Usage: THE MOST IMPORTANT TOTEM IN THE GAME. This single totem defines Horde raid meta and makes Shamans incredibly valuable. Warriors and Rogues gain massive DPS increases from this totem. The extra attacks generate rage for Warriors (enabling 2H Fury spec) and trigger weapon procs for Rogues.
Critical Detail: The buff lasts 10 seconds after totem placement, allowing you to “twist” (replace) the totem with another air totem temporarily, then recast Windfury before the buff expires.
Raid Impact: A well-placed Windfury Totem can increase raid DPS by thousands. Always ensure your melee groups have this buff active.
Grace of Air Totem ⭐⭐⭐⭐
Effect: Increases Agility of party members within range by 77 (max rank).
Best For: Melee DPS groups (twisted with Windfury), Hunter groups, Rogue-heavy compositions
Usage: Agility provides crit chance, armor, and dodge – valuable for Warriors, Rogues, Hunters, and Feral Druids. In optimal play, you “twist” this totem with Windfury Totem to provide both buffs simultaneously (see Advanced Techniques section).
Value: Arguably benefits more classes than any other totem buff. The versatility makes it excellent for mixed groups.
Tranquil Air Totem ⭐⭐⭐⭐
Effect: Reduces threat generated by party members by 20%.
Best For: Threat-sensitive raid encounters, DPS who keep pulling aggro
Usage: Often overlooked but incredibly powerful on specific fights. When your DPS outgear your tank or encounter has strict threat requirements, twisting Tranquil Air into your rotation allows DPS to go harder without ripping aggro. Requires good mana management to twist effectively.
Advanced: More commonly used in later raid tiers when DPS substantially outgear tanks.
Grounding Totem ⭐⭐⭐⭐⭐
Effect: Redirects the next harmful spell cast at a party member to the totem instead.
Best For: PvP (essential), countering specific raid mechanics
Usage: Legendary in PvP. Can redirect Polymorph, Fear, instant-cast nukes, and other spells. Has very low HP so typically only absorbs one spell, but that one spell absorption can win fights. Experienced PvPers will target and destroy it, so use strategically.
PvP Scenarios: Counter enemy Polymorph on your healer, absorb incoming Pyroblast, redirect Fear effects.
Nature Resistance Totem ⭐⭐⭐
Effect: Increases Nature Resistance of party members by 60 (max rank).
Best For: AQ40 (Princess Huhuran), select nature-damage encounters
Usage: Less commonly needed than Fire Resistance, but critical for specific encounters. Princess Huhuran in AQ40 deals massive nature damage requiring resistance stacking. Also useful against nature-damage trash in various raids.
Windwall Totem ⭐
Effect: Reduces physical damage taken from ranged attacks by 50 damage per hit (max rank).
Best For: Niche ranged-heavy encounters (extremely rare)
Usage: Rarely used. Very few situations where this provides more value than your other totem options. The damage reduction is flat (like Stoneskin), so it’s only meaningful against many weak ranged attacks – which almost never happens in PvE.
Sentry Totem ⭐⭐
Effect: Allows you to see through the totem’s perspective for 5 minutes.
Best For: World PvP scouting, checking dangerous areas before entering
Usage: Niche utility for scouting. Can be placed at Blackrock Mountain entrance to see incoming enemies, check if quest area is clear, or scout dungeon entrance for gankers. Far Sight spell is generally more convenient for taking screenshots or looking around.
Totem Management by Content Type
Solo Leveling (1-60)
Standard Setup:
- Earth: Earthbind Totem (kiting is essential)
- Fire: Searing Totem (only when grinding one area) or skip to save mana
- Water: Skip (waste of mana while constantly moving)
- Air: Skip (no party to buff)
Key Strategy: Earthbind Totem is your only critical totem for solo play. Everything else is optional and often not worth the mana cost. See our Enhancement Shaman leveling guide or Elemental Shaman leveling guide for spec-specific details.
Dungeon Groups
Melee-Heavy Group (Warriors/Rogues):
- Earth: Strength of Earth Totem
- Fire: Searing Totem (bosses) / Fire Resistance (if needed)
- Water: Healing Stream Totem
- Air: Windfury Totem (mandatory)
Caster-Heavy Group:
- Earth: Stoneskin Totem (if tank taking heavy damage) or Tremor (fear mechanics)
- Fire: Searing Totem / Resistance totem
- Water: Mana Spring Totem or Healing Stream Totem
- Air: Tranquil Air Totem (threat reduction) or Windfury (if any melee)
Raid Groups
Standard Melee DPS Group (3 Warriors + 1 Rogue + Shaman):
- Earth: Strength of Earth Totem
- Fire: Fire Resistance Totem (boss dependent) or skip
- Water: Fire Resistance Totem (if not using fire slot) or skip
- Air: Windfury Totem (twist with Grace of Air – see below)
Healer Group:
- Earth: Utility (Tremor for fears, Earthbind for adds)
- Fire: Resistance totems as needed
- Water: Mana Spring Totem / Mana Tide Totem (if talented)
- Air: Varies (usually not critical for healer group)
Tank Group:
- Earth: Strength of Earth Totem (threat generation)
- Fire: Resistance totems as needed
- Water: Usually resistance totem in other slot
- Air: Windfury Totem (tank threat)
For optimal raid compositions and advanced techniques, see our Restoration Shaman guide and Enhancement Shaman guide.
PvP
World PvP:
- Earth: Earthbind Totem (kiting/control)
- Fire: Searing Totem (pressure) or Grounding Totem in air slot
- Water: Healing Stream Totem (if grinding between fights)
- Air: Grounding Totem (spell redirect) or Windfury (if with melee)
Battlegrounds (with group):
- Earth: Earthbind (control) or Tremor (fear counter)
- Fire: Varies by situation
- Water: Varies by situation
- Air: Grounding Totem or Windfury Totem (if with Warriors)
Advanced Technique: Totem Twisting
What is Totem Twisting?
Totem twisting is an advanced min-maxing technique where you alternate between two totems of the same element to provide multiple benefits simultaneously. This works because weapon buff totems (Windfury, Flametongue) apply their buff for a duration after the totem is placed, allowing you to temporarily replace the totem without losing the buff.
Windfury + Grace of Air Twist
How It Works:
- Cast Windfury Totem – buff applies immediately, lasts 10 seconds on party members
- Wait 1-2 seconds (GCD + cast time buffer)
- Cast Grace of Air Totem – replaces Windfury Totem but Windfury buff remains active
- Grace of Air buff now active, Windfury buff still active from step 1
- Wait 6-7 seconds
- Cast Windfury Totem again before 10-second buff expires
- Repeat cycle
Result: Your melee DPS have both Windfury AND Grace of Air buffs active ~80% of the time instead of only one.
Mana Cost: Significantly higher than static totems. Only viable when you have strong mana regeneration and aren’t spam-healing.
Best For: Farm content where healers have mana to spare, speed-running dungeons, maximizing parse damage
Windfury + Tranquil Air Twist
How It Works: Same principle as above, but twisting Tranquil Air Totem instead of Grace of Air.
When to Use: Threat-sensitive encounters where DPS are pulling aggro. The 20% threat reduction allows them to push harder without ripping.
Priority: Use on fights where threat is the limiting factor, not healing or mana. More common in later raid tiers (AQ40/Naxxramas).
Tips for Effective Totem Twisting
Addons: Use TotemTimers addon to track when Windfury buff expires on party members. Critical for maintaining consistent twisting.
Mana Management: Twisting doubles (or more) your totem mana costs. Only twist when you can afford it – static Windfury Totem is still excellent.
Group Awareness: Ensure your party members stay in totem range. Totem Mastery talent (40-yard range) makes this much easier.
Don’t Overcomplicate: On progression encounters where you’re spam-healing, just drop Windfury and focus on keeping people alive. Twisting is for optimization, not mandatory.
Practice: Set up a swing timer or metronome to practice the timing. The rhythm becomes muscle memory with practice.
Totem Range & Positioning
Base Range: 20-30 yards (varies by totem)
With Totemic Mastery: 40 yards (highly recommended talent)
Optimal Placement
Raids: Place totems centrally in your group’s position. Your totems only affect your 5-person party, not the entire raid.
Dungeons: Drop totems slightly ahead of tank’s position so entire group stays in range during movement.
PvP: Place Earthbind between you and enemies for kiting. Hide Grounding Totem in grass/objects to prevent destruction.
Key Rule: Totems are stationary – party members must stay in range. Good positioning prevents losing buffs.
Frequently Asked Questions
What’s the most important totem for each spec?
– Elemental: Earthbind Totem for kiting and control.
– Restoration: Depends on encounter — Tremor Totem for fears, resistance totems for specific bosses, Mana Tide Totem for mana-intensive fights.
Single most impactful totem across all content: Windfury Totem — it defines Horde raid meta.
Do I need to complete all totem quests?
– Recommended: Fire Totem (level 10) — unlocks Searing and Magma Totems.
– Optional: Water Totem (level 20) — long quest chain; skip if solo leveling.
See the Shaman Quest Guide for detailed walkthroughs.
Can I have multiple totems of the same element active?
Placing a second totem of the same element destroys the first one.
Does Totemic Mastery talent matter?
– Increases totem range from 20-30 yards → 40 yards, making it easier to buff party members.
– Highly recommended for any Shaman doing group content.
How does Totem Twisting work exactly?
– You can replace it with another Air totem (Grace of Air, Tranquil Air) during those 10 seconds — party members keep the Windfury buff.
– Recast Windfury before 10 seconds expires to maintain both buffs.
Requires practice and careful mana management, but significantly increases group DPS.
Conclusion
Mastering Shaman totems transforms you from an average player into an invaluable asset for any group. Whether providing game-changing Windfury buffs in raids, controlling enemies with Earthbind while leveling, or countering spells with Grounding Totem in PvP, your totem selection defines your effectiveness.
Key Takeaways
✓ Windfury Totem is the most powerful buff in Classic WoW for melee groups
✓ Earthbind Totem is essential for solo leveling – enables kiting to reduce damage
✓ Fire/Frost/Nature Resistance totems are mandatory for specific raid encounters
✓ Tremor Totem is Horde’s only answer to fear mechanics
✓ Totem twisting (advanced) provides multiple buffs simultaneously
✓ Totemic Mastery talent dramatically improves totem effectiveness
✓ Only one totem per element can be active at a time
Related Guides
- Shaman Leveling Guide – General overview for all specs
- WoW Classic Enhancement Shaman Leveling – Best leveling spec
- WoW Classic Elemental Shaman Leveling – Burst caster leveling
- WoW Classic Restoration Shaman Leveling – Healing-focused leveling
May your totems always be in range, and your Windfury procs plentiful!
 World of Warcraft Guides, Lore, Addons & News – Noob to Boss From Azeroth's Newbie to Champion – World of Warcraft Guides


