 World of Warcraft Guides, Lore, Addons & News – Noob to Boss From Azeroth's Newbie to Champion – World of Warcraft Guides
Fathom-Lord Karathress is the fourth boss of the Serpentshrine Cavern raid in TBC Classic Anniversary, and it’s the first true council encounter your raid will face in the instance. Rather than fighting one boss, you’re fighting four at once: Karathress and his three loyal Fathom-Guards, each with their own abilities, threat tables, and tank/healer assignments. Every time a guard dies, Karathress permanently inherits their signature ability, so the fight changes shape as it goes.
This guide covers every ability in the encounter, the correct kill order, and the complete loot table.
Who Is Fathom-Lord Karathress? Quick Lore
Fathom-Lord Karathress commands three Fathom-Guards — Tidalvess, Sharkkis, and Caribdis — who all engage the raid simultaneously alongside him. This makes it a logistics-heavy fight: you’ll likely need three or four tanks, dedicated healing assignments for each, and a pre-planned interrupt rotation. The defining danger of the encounter is Blessing of the Tides — if Karathress drops below 75% health while any guard is still alive, he gains a massive attack and cast speed buff for each surviving guard, which can quickly snowball into a raid wipe.
Make sure your raid has completed the SSC attunement requirements and reviewed the SSC overview guide before attempting this council fight, since coordination matters more here than raw gear.
Fathom-Lord Karathress Abilities
Fathom-Guard Sharkkis
- Multi-Toss — Hits three random players with Physical damage.
- Leeching Throw — Drains health and mana from its target over 12 seconds.
- Summon Fathom Lurker — Spawns a small elemental that knocks back its target and wipes its own threat, then explodes on death for AoE damage. Immune to crowd control.
- Summon Fathom Sporebat — Spawns an add whose only ability is a knockback. Also immune to crowd control.
- The Beast Within — Increases Sharkkis’ damage by 30% and his pets’ damage by 50%.
Fathom-Guard Tidalvess
- Spitfire Totem — Deals massive damage to five targets. This totem is the single highest-priority kill target whenever it’s active.
- Poison Cleansing Totem — Dispels a poison effect periodically.
- Earthbind Totem — Slows everyone standing near it.
- Frost Shock — Damages and slows Tidalvess’ highest-threat target.
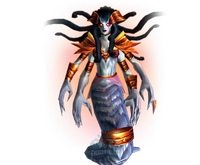
Fathom-Guard Caribdis
- Water Bolt Volley — An instant-cast Frost attack hitting everyone in range.
- Summon Cyclone — Spawns a roaming tornado that doubles the cast time of anyone it touches.
- Tidal Surge — Freezes a random player and everyone within 10 yards of them. Spreading out limits how many people it catches.
- Healing Wave — A large heal cast roughly every 15 seconds. This must be interrupted every time, or the fight drags on indefinitely.
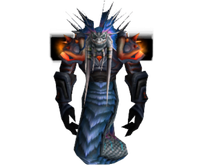
Fathom-Lord Karathress
- Blessing of the Tides — Below 75% health, Karathress gains a major attack and cast speed buff for every Fathom-Guard still alive. Killing the guards first is the only way to avoid this.
- Sear Nova — Damages anyone in melee range.
- Cataclysmic Bolt — Hits a random player for 50% of their max health and stuns them.
- Power of Caribdis, Power of Sharkkis, and Power of Tidalvess — When each guard dies, Karathress permanently inherits one of their abilities (Tidal Surge, The Beast Within, and Spitfire Totem, respectively).
Strategy for Fathom-Lord Karathress
Pulling the Boss
This encounter typically needs three to four tanks, so assignments need to be locked in before the pull: one tank each for Tidalvess, Sharkkis, Caribdis, and Karathress himself. Send a Rogue or Warlock with the Caribdis group, since a cast-speed slow like Curse of Tongues or Mind-numbing Poison makes interrupting her Healing Wave far more reliable.
Kill Order
- Fathom-Guard Tidalvess
- Fathom-Guard Sharkkis
- Fathom-Guard Caribdis
- Fathom-Lord Karathress
Executing the Fight
Separate Caribdis from the rest of the raid immediately, both to minimize the splash from her casts and to keep her group spread out against Tidal Surge. A dedicated interrupt rotation on this group should never miss a Healing Wave cast.
The rest of the raid focuses Tidalvess first, since his Spitfire Totem is the most dangerous threat in the early fight — kill it on sight every time it appears. While doing this, you can stack and cleave Sharkkis and Karathress together, but watch Karathress’ health closely: never let him drop below 75% while any guard is still alive, or Blessing of the Tides will ramp his damage output to dangerous levels.
Once Tidalvess and Sharkkis are both dead, switch the raid onto Caribdis. After all three guards are down, spread out before committing fully to Karathress, since he’ll have inherited Tidal Surge from Caribdis and abilities from the other two guards as well.
Role-Specific Tips
Tanks: The Sharkkis tank needs to be ready to pick up adds the moment they spawn — Protection Paladins and Feral Druids tend to have an easier time holding both the boss and his summons at once. Whoever tanks Caribdis should hold her in an isolated corner to limit AoE exposure to the raid.
Healers: Expect three to four tanks taking damage simultaneously in the opening minutes, so healing assignments need to be locked in per-tank. Save cooldowns for whenever The Beast Within is active on Sharkkis or Karathress, since that’s the highest sustained damage window in the fight.
DPS: Spitfire Totem is always the top priority the instant it appears — drop what you’re doing and kill it. If you’re assigned to the Caribdis group, your only job is landing every interrupt on Healing Wave; missing even one can extend the fight long enough to cause a wipe.
Fathom-Lord Karathress Loot Table
For the complete item list across every SSC encounter, check our Serpentshrine Cavern loot guide. Here’s what Karathress himself drops:
| Item | Type | Slot |
|---|---|---|
| Leggings of the Vanquished Defender | Tier Token | Legs (Tank) |
| Leggings of the Vanquished Hero | Tier Token | Legs (Caster) |
| Leggings of the Vanquished Champion | Tier Token | Legs (Melee DPS) |
| World Breaker | Weapon | Two-Handed Mace |
| Sextant of Unstable Currents | Accessory | Trinket |
| Fathom-Brooch of the Tidewalker | Accessory | Trinket |
| Frayed Tether of the Drowned | Accessory | Necklace |
| Bloodsea Brigand’s Vest | Leather | Chest |
| Soul-Strider Boots | Cloth | Boots |
Karathress drops the first set of Tier 5 leg tokens available in Serpentshrine Cavern, alongside World Breaker, one of the strongest two-handed maces available at this stage of TBC Classic.