 World of Warcraft Guides, Lore, Addons & News – Noob to Boss From Azeroth's Newbie to Champion – World of Warcraft Guides
Morogrim Tidewalker is the fifth boss of the Serpentshrine Cavern raid in TBC Classic Anniversary, and many raids find him tougher than his position in the kill order suggests. The fight itself isn’t mechanically complicated, but it punishes poor add control and healer awareness harder than almost anything else in the instance — repeated waves of Murlocs rush the raid and tend to beeline straight for healers if tanks don’t pick them up fast enough.
This guide covers every ability Morogrim uses, how the fight changes once he hits 25% health, and the full loot table.
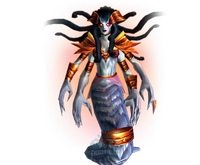
Who Is Morogrim Tidewalker? Quick Lore
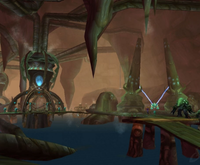
Morogrim Tidewalker is a massive sea giant fought in a room built around a central waterfall, with Murloc spawn points at both entrances. The encounter plays out in two parts: from 100% to 25% health, the raid manages periodic Earthquake casts that summon Murloc waves and randomly teleports players into the waterfall. Below 25%, Morogrim stops doing that and instead summons slow-moving Water Globules that explode on contact — at that point, it largely becomes a straightforward DPS race.

Before pulling, make sure your raid has completed the SSC attunement requirements and reviewed the SSC overview guide, since this fight rewards a calm, well-drilled raid far more than it rewards gear.
Morogrim Tidewalker Abilities
- Earthquake — Deals damage to everyone within 50 yards of Morogrim and summons two packs of six Murlocs, one from each entrance to the room.
- Watery Grave — Teleports four random players to the top of the central waterfall, stunning them and dropping them down, dealing fall damage on the way.
- Tidal Wave — A frontal cone of Frost damage that also applies an attack speed-reducing debuff for 15 seconds. Only hits players standing in front of the boss.
- Summon Water Globule — Active only below 25% health. Spawns Water Globules at the waterfalls that fixate on a random player and slowly move toward them, exploding for heavy damage on contact.
Strategy for Morogrim Tidewalker
Pulling the Boss
Like Fathom-Lord Karathress, this fight goes much more smoothly with a third tank dedicated purely to add control. Assign one tank to each entrance Murlocs spawn from, and pair each with a Mage or similar slowing class to control the pack with Blizzard or an equivalent AoE slow until threat is locked in.
Position the main tank so Morogrim is facing into a wall or pillar from the start. This keeps Tidal Wave’s frontal cone away from the raid for the entire fight.
Phase One — 100% to 25% Health
This phase is a steady cycle: Morogrim attacks normally, periodically casts Watery Grave on four random players, and at intervals unleashes Earthquake, which damages the whole raid and spawns Murlocs at both entrances.
The critical rule here is healer discipline. When Earthquake lands, the raid’s health bars will drop hard — but healers should hold off on topping everyone up immediately and instead wait until the add tanks have secured threat on the incoming Murlocs. Healing too early risks pulling aggro straight onto healers, since Murlocs will target whoever generates the most threat against them. Once the tanks have the packs locked down, it’s safe to top the raid back up and AoE the Murlocs down quickly, ideally before the next Earthquake arrives.
Watery Grave can target anyone, including tanks, so keep a couple of healers specifically watching for it and ready to heal through the fall damage.
Phase Two — Below 25% Health
Once Morogrim drops to 25%, he stops casting Watery Grave entirely and begins Summon Water Globule instead. These Globules spawn at the waterfalls and crawl slowly toward a fixed target, exploding for heavy damage to anyone caught nearby. Because they move slowly and always spawn from the same spots, the simplest counter is repositioning the boss to a corner of the room the Globules can’t reach in time. The tank should walk Morogrim back as soon as this phase starts, with the rest of the raid following.
This phase is largely a DPS race from here — save major raid cooldowns for this stretch if your raid has been struggling to close out the fight quickly.
Role-Specific Tips
Tanks: Keep Morogrim’s back to the raid at all times to avoid Tidal Wave cleaving the group. If you’re on Murloc duty, your priority is locking down threat the instant the pack spawns — using a slow or stun on the pull helps buy the time needed. Once Phase Two begins, reposition the boss into a corner away from the Globule spawn points.
Healers: Don’t panic-heal immediately after Earthquake — wait for the Murlocs to be tanked first, or you risk pulling them onto yourself. Have two healers specifically tracking the Watery Grave debuff so nobody gets dropped from the waterfall and left to die from fall damage.
DPS: Hold AoE on the Murlocs until the assigned tanks call for it; jumping the gun before threat is established can get healers killed. Use any self-healing or healthstones after Earthquake to take pressure off your healing team, and save cooldowns for the Phase Two burn once Watery Globules start appearing.
Morogrim Tidewalker Loot Table
For the complete item list across every SSC encounter, see our Serpentshrine Cavern loot guide. Here’s what Morogrim Tidewalker drops:
| Item | Type | Slot |
|---|---|---|
| Serpent-Coil Braid | Accessory | Trinket |
| Luminescent Rod of the Naaru | Weapon | Wand |
| Talon of Azshara | Weapon | One-Handed Sword |
| Pendant of the Lost Ages | Accessory | Necklace |
| Band of the Vigilant | Accessory | Ring |
| Ring of Sundered Souls | Accessory | Ring |
| Razor-Scale Battlecloak | Accessory | Cloak |
| Pauldrons of the Argent Sentinel | Plate | Shoulders |
| Warboots of Obliteration | Plate | Boots |
| Mantle of the Tireless Tracker | Shoulders | |
| Girdle of the Tidal Call | Belt | |
| Gnarled Chestpiece of the Ancients | Leather | Chest |
| Illidari Shoulderpads | Cloth | Shoulders |
Morogrim doesn’t drop a Tier 5 token, but his trinkets and weapons — particularly Talon of Azshara and the Luminescent Rod of the Naaru — make him a strong off-week target even after your raid has moved past him in progression.