 World of Warcraft Guides, Lore, Addons & News – Noob to Boss From Azeroth's Newbie to Champion – World of Warcraft Guides
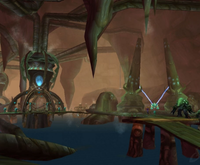
Lady Vashj is the sixth and final boss of the Serpentshrine Cavern raid in TBC Classic Anniversary, and she’s the encounter that separates raids who are merely geared from raids who are genuinely coordinated. This is one of the longest fights in all of TBC Classic, built around three distinct phases that each demand a completely different set of responsibilities from the raid — from spreading out to avoid chain lightning, to physically carrying quest items across the platform while dodging adds, to a final all-out DPS burn.
This guide breaks down all three phases, every add you’ll face, and the complete loot table — including the quest item that unlocks Mount Hyjal attunement in Phase 3.
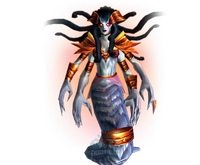
Who Is Lady Vashj? Quick Role
Lady Vashj is the naga ruler of Coilfang Reservoir and the final encounter standing between your raid and full clears of Serpentshrine Cavern. Unlike the five bosses before her, this fight isn’t won through gear checks alone — it requires every player in the raid to understand their personal responsibility during the chaotic second phase, where adds, shield generators, and quest items all need to be managed simultaneously.
Before attempting Vashj, make sure your raid has completed the SSC attunement requirements and reviewed the SSC overview guide. Note that Vashj also drops a quest item required for Mount Hyjal attunement, so this fight matters well beyond your SSC clear.
Lady Vashj Abilities
- Static Charge — A debuff appears on a random raid member and deals Nature damage to anyone within 5 yards of them. If you’re targeted, move away from the rest of the raid immediately.
- Shock Blast — A heavy hit on whoever currently has aggro on Vashj, stunning them for five seconds. A Shaman’s Grounding Totem can absorb this cast entirely.
- Shoot — Used only when nobody is in melee range; fires at the highest-threat target for roughly auto-attack damage.
- Entangle — Roots everyone within 15 yards of Vashj. Cleared by movement-impairing immunities like Blessing of Freedom or Cloak of Shadows.
- Multi-Shot — Targets a random player and damages them along with anyone standing nearby.
- Forked Lightning — Exclusive to Phase 2. A cone of lightning fired in front of Vashj; avoid standing in front of her during this phase.
Add Abilities
- Coilfang Elite — Uses Cleave and Hamstring. Must be tanked facing away from the raid.
- Coilfang Strider — Casts Mind Blast on its tank and pulses Panic every two seconds, fearing anyone in melee range. No melee should ever engage this add.
- Tainted Elemental — Casts Poison Bolt, a minor Nature DoT. These are the carriers of the Tainted Core quest item needed to disable shield generators.
- Enchanted Elemental — Uses Surge to run toward Vashj; if they reach her, she gains a stacking damage buff. These must be killed before they connect.
- Toxic Spore Bat — Drops Toxic Spores, permanent poison puddles that act as a soft enrage by shrinking usable space on the platform.
Strategy for Lady Vashj
Pulling the Boss
This is a long fight, so pre-assigned positions matter more here than in any other SSC encounter. Spread healers evenly around the platform from the start, and emphasize mana efficiency — there’s no single burst-damage moment to plan cooldowns around, but the fight’s length can drain mana pools that aren’t managed carefully.
Phase 1 — Spread and Survive
The opening phase is the simplest of the three. The raid’s main job is staying spread out to minimize the splash from Static Charge, while a Shaman keeps Grounding Totem ready to absorb Shock Blast. This phase ends automatically once Vashj reaches 70% health.
Phase 2 — Shield Generators and Adds
This is the defining phase of the encounter. At 70% health, Vashj raises a damage immunity shield, retreats to the center of the room, and stops attacking apart from Forked Lightning. Four shield generators are positioned around the platform, and all four must be disabled before she becomes vulnerable again.
To disable a generator, a player needs to be holding a Tainted Core item and standing next to it. Tainted Cores only drop from killing Tainted Elementals, and once you’re holding one, you become rooted — the only way to move it is by using the item on another player to pass it along. Most raids handle this by having two players relay the Core back and forth toward whichever generator needs it, with a designated tanky or high-health player stationed at each generator to receive and disable it. Choose disablers carefully, since Forked Lightning can still target anyone on the platform, including someone currently holding a Core.
While this is happening, several add types spawn simultaneously, each needing different handling:
- Coilfang Striders must be slowed and tanked at range by anyone capable of holding threat from a distance — their fear aura makes melee engagement impossible. These are the top priority for ranged DPS.
- Coilfang Elites are tanky melee adds with a dangerous Cleave. A conventional tank can hold them while melee DPS chips away; they don’t need to die instantly, just before the next wave arrives.
- Enchanted Elementals continuously spawn from the water’s edge and run toward Vashj. Killing them quickly is essential, since each one that reaches her adds a stacking damage buff. Hunters are particularly effective here thanks to their range and mobility.
- Tainted Elementals are the source of your Tainted Cores — killing one lets a nearby player loot the Core needed to disable a generator.
Phase 3 — The Final Burn
Once all four generators are disabled, Vashj becomes active again, her threat table fully resets, and Toxic Spore Bats begin spawning. Clear any leftover Phase 2 adds immediately, then prioritize the Spore Bats to limit how much of the platform gets covered in poison. From here, it’s a combination of the original Phase 1 mechanics layered on top of a straightforward burn — this is the one true DPS check in the fight, so save your strongest cooldowns for this stretch.
Role-Specific Tips
Tanks: Keep Coilfang Elites angled away from the raid to avoid Cleave. Position yourself near the center of the platform as Phase 2 winds down, since Vashj’s threat resets completely the moment the fourth generator goes down and someone needs to be ready to pick her up immediately.
Healers: Stay at your assigned position throughout Phase 1 and Phase 2 to minimize unnecessary movement and damage. Given the fight’s length, prioritize mana conservation over the first two phases so you have resources left for the Phase 3 burn.
DPS: Coilfang Striders are always the top kill priority for ranged DPS — melee simply cannot engage them due to Panic. Save major cooldowns for Phase 3, since it’s the only real damage check in the entire encounter.
Lady Vashj Loot Table
For the complete item list across every SSC encounter, see our Serpentshrine Cavern loot guide. Here’s what Lady Vashj drops:
| Item | Type | Slot |
|---|---|---|
| Vashj’s Vial Remnant | Quest Item | Mount Hyjal Attunement |
| Prism of Inner Calm | Accessory | Trinket |
| Serpent Spine Longbow | Weapon | Bow |
| Fang of Vashj | Weapon | Dagger |
| Lightfathom Scepter | Weapon | Main Hand Mace |
| Coral Band of the Revived | Accessory | Ring |
| Ring of Endless Coils | Accessory | Ring |
| Krakken-Heart Breastplate | Plate | Chest |
| Glorious Gauntlets of Crestfall | Plate | Gloves |
| Cobra-Lash Boots | Boots | |
| Belt of One-Hundred Deaths | Leather | Belt |
| Runetotem’s Mantle | Leather | Shoulders |
| Vestments of the Sea-Witch | Cloth | Chest |
| Helm of the Vanquished Defender | Tier Token | Helmet (Tank) |
| Helm of the Vanquished Hero | Tier Token | Helmet (Caster) |
| Helm of the Vanquished Champion | Tier Token | Helmet (Melee DPS) |
Vashj’s Vial Remnant deserves special mention: it’s a required quest item for The Vials of Eternity, which unlocks Mount Hyjal attunement once Phase 3 arrives. Every raid member who wants to progress into Tier 6 content needs their own copy, so don’t pass this item up even after your gear needs are met.