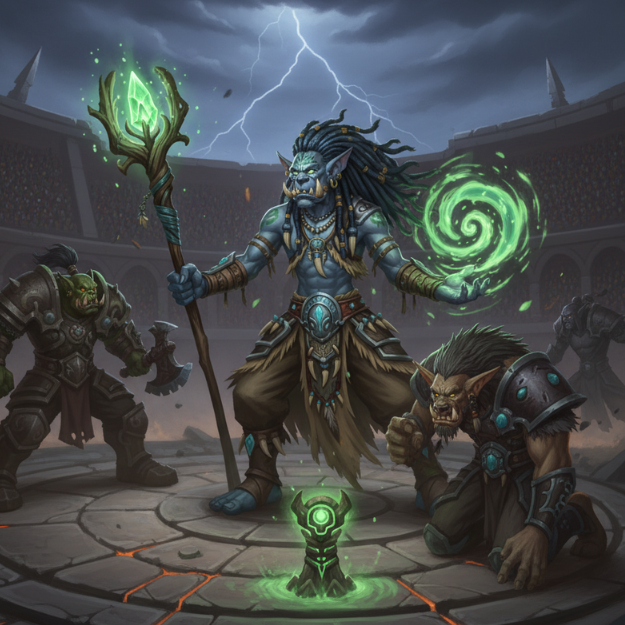
Restoration Shamans are powerful healers in WoW Classic PvP, providing strong AoE healing with Chain Heal, damage boosts through Windfury Totem, crowd control with Purge and Earth Shock, and unmatched utility via the totem system.
Key Challenge: As a healer, you are a primary target. Proper timing of heals is crucial, as being interrupted can temporarily lock you out of healing.
This WoW Classic Restoration Shaman PvP Healing Guide helps you master healing, positioning, and totem usage to stay effective in battlegrounds and world PvP.
Related Guides
- WoW Classic Restoration Shaman PvE Guide – Raiding and dungeon strategies
- WoW Classic Restoration Shaman Leveling Guide – Level 1-60 efficiently
- WoW Classic Shaman Macros Guide – Essential macros for PvP
Best Race for Restoration PvP Shaman
Orc – Best Choice ⭐
Hardiness: 30% total stun resistance – game-changing against Rogues, Warriors, and Paladins. Allows continued healing through stun attempts.
Tauren – Balanced Option
War Stomp: 2s AoE stun creates uninterrupted healing windows. Endurance: 5% extra HP improves survivability.
Troll – PvE Focused
Berserking: 10-30% cast speed better for PvE raiding. Still vulnerable to interrupts in PvP.
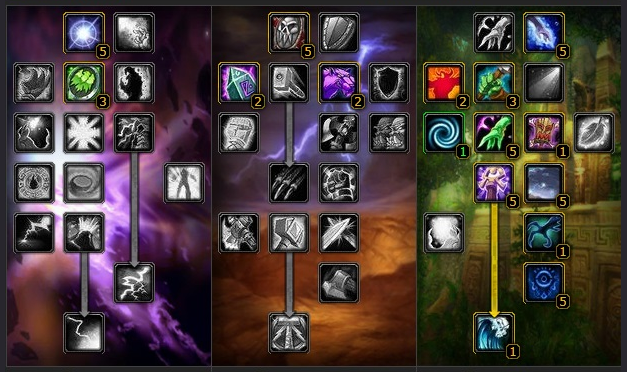
WoW Classic Restoration Shaman Talent Tree Calculator Build
This is the strongest overall PvP build. You maintain nearly all relevant Restoration talents while gaining severe damage potential.
Elemental Tree (30): Elemental Focus, Call of Thunder, Improved Fire Totems, Nature’s Swiftness
Restoration Tree (21): Tidal Focus, Improved Healing Wave, Ancestral Healing, Tidal Mastery
Playstyle: Start offensive with Lightning Bolt, stay ready to switch to Lesser Healing Wave instantly, use macros to swap between Spell Power and Healing Power gear.
Nature’s Swiftness vs Elemental Mastery: Choose Nature’s Swiftness – can save lives or secure kills (3-min CD).
Restoration Shaman PvP Stat Priority
- Stamina – Survival is paramount
- Intellect – Larger mana pool for sustained fights
- Spell/Healing Power – Increases throughput
- Spell Crit – Burst healing and procs
- MP5 – Less important in PvP
Avoid: Spirit (rarely outside five-second rule), Spell Hit (healing can’t miss)
PvP Gear Sets
- Champion’s Stormcaller (Blue) – Starting PvP set via Honor System
- Warlord’s Earthshaker (Purple) – BiS PvP stats via high-rank grind
Strategy: Start with PvE raiding gear, gradually replace with Champion’s pieces, aim for Warlord’s if pushing high ranks.
Essential Abilities
Core Healing Spells
- Lesser Healing Wave (1.5s) – PRIMARY PvP heal
- Nature’s Swiftness + Healing Wave (Instant) – Emergency saves only
- Chain Heal (2.5s) – Only when safe from interrupts
- Healing Wave (3.0s) – Only when completely safe
Key Utility Spells
- Earth Shock – Interrupt enemy casts (downrank for efficiency)
- Purge – Remove enemy buffs (spam vs Druid HoTs and Priest shields)
- Frost Shock – 50% slow for kiting
- Ghost Wolf – 40% movement speed
- Flame Shock – Prevents Rogue restealth
Important Totems
Earth Totems:
- Tremor Totem ⭐ – Only Horde Fear removal (critical vs Priests/Warlocks)
- Earthbind Totem – Slows enemies for kiting/chasing
- Stoneskin Totem – Reduces physical damage vs Rogues
Fire Totems:
- Searing Totem – Pressure on enemy casters
- Fire Nova Totem – AoE burst damage
Water Totems:
- Mana Tide Totem ⭐ – Rapid group mana regen
- Poison Cleansing ⭐ – Must drop vs Rogues and Hunters
- Mana Spring – Standard backup option
Air Totems:
- Windfury Totem ⭐ – Massive melee burst (maintain uptime)
- Grounding Totem ⭐ – Absorbs one hostile spell (timing dependent)
- Grace of Air – +Agility for Hunter groups
Best Professions for Restoration PvP Shaman
Engineering – Best for PvP ⭐
Key Items:
- Thorium Grenade – AoE stun (60s CD)
- Flame/Ice/Shadow Reflector – Reflect spells + resistance
- Goblin Rocket Helmet – 10s incapacitate
- Goblin Sapper Charge – Massive AoE burst
Pair with: Mining
Alchemy – Best for Consumables
with Alchemy Craft essential PvP consumables yourself: Free Action Potion, Limited Invulnerability Potion, Major Healing/Mana Potions.
Pair with: Herbalism
Blacksmithing – Situational
Glimmering Mithril Insignia – 30s Fear immunity (good vs Priests/Warlocks)
Must-Have Consumables
Priority List
- Free Action Potion (FAP) ⭐⭐⭐ – Immunity to slows/roots/stuns – ABSOLUTELY BROKEN
- Living Action Potion (LAP) – Removes movement impairing (negates Rogue opener)
- Limited Invulnerability Potion (LIP) – 6s immunity to physical
- Restorative Potion – Removes magical debuffs (breaks Polymorph)
- Heavy Runecloth Bandage – Heals without mana
- Alterac Manna Biscuit – Best food (works ANYWHERE, not just AV!)
Usage Tips
FAP: Use liberally when focused by multiple enemies or need uninterrupted healing.
LAP: Pop immediately after Rogue Cheap Shot to negate Kidney Shot.
LIP: Use during Warrior Mortal Strike window or Rogue burst combo.
Resto Pot Advanced Tactic: Pop before Mage Polymorph finishes → breaks Polymorph → Earth Shock next cast.
Carry per 2-hour session: 10x FAP, 5x LAP, 3x LIP, 5x Resto Pot, 20x Bandages, 20x Manna Biscuit, 5x Major Mana Pot (Budget: 30-50g)
Resto PvP Strategy
Healing Priority
- Yourself – Can’t heal if dead
- Other Healers – Multiply healing output
- Flag Carriers / Key DPS – Win condition targets
- Everyone Else – General healing
Positioning Guidelines
DO:
- Stay within 12 yards for optimal Chain Heal jumps
- Position totems centrally (20-yard range)
- Maintain line of sight to your group
- Use terrain to break enemy line of sight
- Keep moving unpredictably
DON’T:
- Stand in the open
- Overextend away from your group
- Forget totem placement ranges
- Stand still
Offensive Support
- Purge Spam – Remove shields, HoTs, buffs
- Earth Shock – Interrupt enemy healers (2s lockout)
- Frost Shock – Slow fleeing enemies
- Searing Totem – Cast pushback pressure on healers
Totem Management
Pre-Fight Setup:
- Windfury/Grace of Air
- Strength of Earth/Tremor
- Searing/Fire Nova
- Mana Spring/Poison Cleansing
Reactive Totems:
- Fear incoming → Tremor Totem
- Enemy focus → Grounding Totem
- Melee chasing → Earthbind Totem
- Heavy poison → Poison Cleansing
- Need healing → Healing Stream
Battleground Tactics for Restoration Shaman
Warsong Gulch
Flag Carrier Support: Stick with FC, spam Lesser Healing Wave, pre-drop Tremor before Priests arrive, Frost Shock enemy FCs.
Mid-Field: Support DPS with Windfury and Grounding totems.
Arathi Basin
Flag Defense: Position totems at flags (Tremor, Grounding, Searing). Use Ghost Wolf for rapid rotation between bases.
Scout: Use Far Sight to spot incoming enemies.
Alterac Valley
Early: Support main assault with Windfury and Mana Spring.
Mid: Heal commanders/lieutenants with defensive totems.
Late: Maximize healing output with Mana Tide during boss fight. Buy Manna Biscuits from quartermaster.
Class Matchups
vs Rogues
- Living Action Potion after Cheap Shot
- Poison Cleansing Totem (must drop)
- Earthbind when they’re on you
- Flame Shock to prevent restealth
- Orc racial for stun resistance
vs Mages
- Restorative Potion before Polymorph
- Grounding Totem to absorb Polymorph
- Engineering Reflectors
- Earth Shock to interrupt
- Stay mobile
vs Warriors
- Free Action Potion vs Hamstring spam
- Limited Invulnerability vs Mortal Strike
- Earthbind when they charge
- Frost Shock to kite
- Keep topped above 50% HP
vs Priests/Warlocks
- Pre-drop Tremor Totem
- Purge shields continuously
- Earth Shock to interrupt Fear
- Glimmering Mithril Insignia for Fear immunity
Recommended Addons
Essential
- Healbot / VuhDo – Click-casting on raid frames
- Grid + Clique – Alternative click-casting
- Decursive – One-button cleansing
- TotemTimers – Track totem durations
- WeakAuras – Custom cooldown alerts
Quality of Life
- BigWigs / DBM – Encounter warnings
- Bartender4 – Action bar customization
- OmniCC – Cooldown numbers
- ClassicCastbars – Enemy cast bars
Quick Reference
Emergency Response
| Situation | Immediate Response | Follow-Up |
|---|---|---|
| Rogue opens | Living Action Potion | Earthbind → Ghost Wolf |
| Warrior charges | Free Action Potion | Frost Shock → Heal |
| Mage Polymorph | Grounding Totem | Earth Shock next cast |
| Priest Fear | Tremor Totem | Purge shields |
| Low mana <30% | Drink immediately | Call out to team |
| Ally <10% HP | Nature’s Swiftness + Heal | Continue spam |
Totem Quick Guide
| Situation | Earth | Fire | Water | Air |
|---|---|---|---|---|
| Standard Melee | Strength | Searing | Mana Spring | Windfury |
| vs Priests/Locks | Tremor | Searing | Mana Spring | Windfury |
| vs Rogues/Hunters | Strength | Searing | Poison Cleansing | Windfury |
| vs Mages (Frost) | Stoneskin | Frost Resist | Mana Spring | Grounding |
| Being Chased | Earthbind | Fire Nova | Mana Spring | Grounding |
| Defending Flag | Earthbind | Searing | Mana Spring | Grounding |
Advanced Tips
Positioning Mastery
- Never stand still while casting
- Hide behind pillars to break line of sight
- Stay with your team (between frontline and backline)
Cooldown Management
Don’t save cooldowns for “perfect” moment – use them proactively:
- Nature’s Swiftness (3 min) – Life-or-death moments
- Mana Tide Totem (4 min) – Heavy healing phases
- Free Action Potion (2 min) – When focused
- Limited Invulnerability (2 min) – Physical burst
Communication
Critical callouts:
- “Healer getting focused!” – Request peels
- “Purging [target]” – Coordinate pressure
- “Tremor down” – Fear protection up
- “Low mana” – Team adjusts
- “Grounding ready” – Coordinate CC
Mana Efficiency
- Downrank Lesser Healing Wave (Rank 4-6) for small damage
- Let other healers top off targets >80% HP
- Use bandages during lulls
- Drink aggressively between fights
Final Tips
Mindset
DO:
- Stay calm under pressure
- Communicate with your team
- Use consumables liberally
- Adapt to enemy composition
DON’T:
- Panic when focused
- Try to DPS when allies need healing
- Save consumables for “perfect” moment
- Tunnel vision on health bars
Practice Drills
- Drop all 4 totems in <3 seconds
- Swap Tremor/Grounding reactively
- Practice gear swap macros mid-combat
- Practice consumable timing (FAP on Rogue opener)
Progression Checklist
Beginner:
- ☐ Understand healing priority
- ☐ Keep single target alive under pressure
- ☐ Know pre-fight totems
- ☐ Carry basic consumables
Intermediate:
- ☐ Heal multiple targets simultaneously
- ☐ Reactive totem usage
- ☐ Use Purge and Earth Shock effectively
- ☐ Full consumable loadout
Advanced:
- ☐ Predict and pre-counter enemy abilities
- ☐ Maximize totem uptime and placement
- ☐ Coordinate cooldowns with team
- ☐ Perfect gear swapping
- ☐ Shotcall for your group
Conclusion
Restoration Shamans combine powerful healing with unmatched utility and disruption. Your success depends on survivability, totem mastery, disruption, positioning, and communication.
Remember: You’re not just a heal bot – you’re a force multiplier. Your totems amplify ally damage, your Purges remove enemy defenses, and your interrupts shut down enemy healers.
Related Resources
- WoW Classic Restoration Shaman PvE Healing Guide – Complete raiding strategies
- WoW Classic Elemental Shaman PvE Dps Guide – Complete Elemental strategies for raids
- WoW Classic Enhancement Shaman PvE Dps Guide – Complete Enhancement strategies for dungeons
Good luck in the battlegrounds, and may your Chain Heals always crit!
 World of Warcraft Guides, Lore, Addons & News – Noob to Boss From Azeroth's Newbie to Champion – World of Warcraft Guides


